Uranograph

Manual
fw1.2
last update: 03 March 261-1 Introduction
The Clank Uranograph is a highly expressive desktop synthesizer that merges classical instruments' nuanced performance qualities with modern synthesis's vast sonic potential.
It features dual touch-sensitive keyboards with stainless steel plates that respond to velocity and continuous pressure, enabling fluid microtonal playing and dynamic phrasing.
A powerful digital sound engine uses additive phase distortion synthesis to create an expansive tonal palette ranging from bell-like chimes to aggressive textures.
Integrated effects, stereo delay, reverb, and a dual-reel looper make the Uranograph a self-contained sonic ecosystem for performance and sound design. With support for non-standard tunings, extensive modulation options, and preset recall, the Uranograph invites musicians to explore new musical territories with precision and creativity.
Uranograph is the result of years of research into West Coast synthesis philosophies and performative control interfaces. We don’t see it as just a synth racked somewhere in the studio or a preset machine—rather, it’s an instrument to grow with, one that rewards exploration and mastery over time.Uranograph was designed to be portable, immediate, and deep—a kind of electronic music box for serious play and performance.We hope the Uranograph brings you as much fun and inspiration as we had while designing it. Dive in, explore, and let it shape your sound.1-2 Technical Specification
Uranograph is a dual-CPU digital instrument designed for high-performance audio processing and real-time control.
The audio engine features a 24-bit high-quality codec, delivering pristine sound fidelity.
Power Supply: 15V DC center positive
Power Consumption: 500mA
DC power banks are welcome to make it portable!
Precision CNC-machined from a solid aluminum block, anodized and laser-engraved for durability.
Capacitive touch plates made from stainless steel offer long-lasting life.
Touch-bend surfaces crafted from special opaline black plexiglass, interacting dynamically with underlying LED lighting.
VESA 75x75 M6 screws on the back
Dimensions: 350mmx355mm
Height:
chassis 30
wood 10mm
knob 27mm
feet 3mm
total 70 mm
Weight: 2,70kg
Output: 2x TRS balanced output, 1x headphones output, 1x analog clock out
Input: XLR/6,3mm combo input with preamp and phantom power, 1x MIDI TRS A / analog clock In, 1x CV IN
1-3 Getting Started
Powering Up the Uranograph
Connect your audio output:
For live or studio use, connect the main balanced output (6.3mm TRS jack) to your mixer, audio interface, or amplifier.
Alternatively, plug your headphones into the dedicated 3.5mm headphone output for private monitoring.
Connect power:
Use the included 15V DC power supply (center-positive).
Insert the barrel connector into the power input on the rear panel.
Turn on the unit:
Press the power button located on the top side of the chassis.
Wait for startup:
The screen and LEDs will display the boot animation.
Once you see the message: “Let’s make some music!”, the system is ready.
Before Playing
Set volume safely:
If you're using the main output, turn the Main Output Volume to a low level to avoid loud pops or surprises.
If you're using headphones, adjust the Headphone Volume accordingly.
Check internal volumes:
Make sure the Filter Amp and Synth Main Volume (Mixer section) are not set to 0% — or you won’t hear any sound!
Play Your First Note
Tap any of the note Keyboard
You should immediately hear a sound
Press harder to increase the volume and brightness of the sound.
Release the plate to end the note.
1-4 Resetting the Synthesizer
Before you begin sound design or performance, resetting the Uranograph to its base state is a good idea. This gives you a clean starting point—a simple sine wave—ideal for shaping new sounds from scratch.
You only need to adjust the parameters listed below; all others can remain as they are. With these settings, the uranograph will produce a pure tone, perfect for starting fresh setups.
Mod Amount: 0%
Size: 0%
Alias: 0%
Tilt: 50%
Fold: 25%
Sub Amp (Sub Oscillator Level): 0%
Resonance (Q): 0%
Filter: 100%
Pan: 50% (center)
Delay Mix: 0%
P0: 0%
Lfo Amount: 0%
Diffuse (Reverb): 0%
ASD attack: 0%
Metronome: 0%
Synth main volume > 0%
Navigate
the
menus
2-1 Overview
While the Uranograph is designed to be played intuitively and on the fly, it also includes a few streamlined menus for accessing deeper functions and configuration options.
There are three primary menus, accessible via the three small buttons located above the encoder, when a menu is active, its corresponding LED will light up, confirming the selection.

Keyboard Menu

Modulation Assign Menu
System Menu
2-2 How to navigate
Navigation is consistent across all menus:
Select a menu using its dedicated button above the encoder.
The corresponding LED will illuminate.
Turn the encoder to scroll through menu entries.
The currently selected item is highlighted in yellow.
Press the encoder to enter edit mode.
The selected entry will turn red.
Turn the encoder again to adjust the value.
To confirm the change and exit edit mode, press the encoder again.
This simple interface ensures fast and efficient editing without the need for deep menu diving — keeping the instrument focused on performance-first interaction.
2-3 Menu elements list
1. Keyboard Menu
Use this menu to adjust pitch and scale-related settings:
Current Keyboard Layout – Select from 50 preloaded scales
Currently Selected Note – edit the highlighted note
Global Transposition – Shift all notes up or down in semitones
Integer Frequency – Coarse tuning of the selected note (Hz)
Decimal Frequency – Fine-tuning of the selected note (Hz)
Alias 1 Transposition – Interval offset for the first harmonizer voice
Alias 2 Transposition – Interval offset for the second harmonizer voice

2. Modulation Assignment Menu
Configure modulation routing and intensity:
Mod Routing Overview – Recap screen showing current assignments
LFO Destination – Select one destination for the LFO modulation
P0 Destination – Assign the pressure output of the note keyboard
P1 Destination – Assign P1 ModKeys to a parameter
P1 Maximum Amount – Set the modulation depth for P1
P2 Destination – Assign P2 ModKeys to a parameter
P2 Maximum Amount – Set the modulation depth for P2
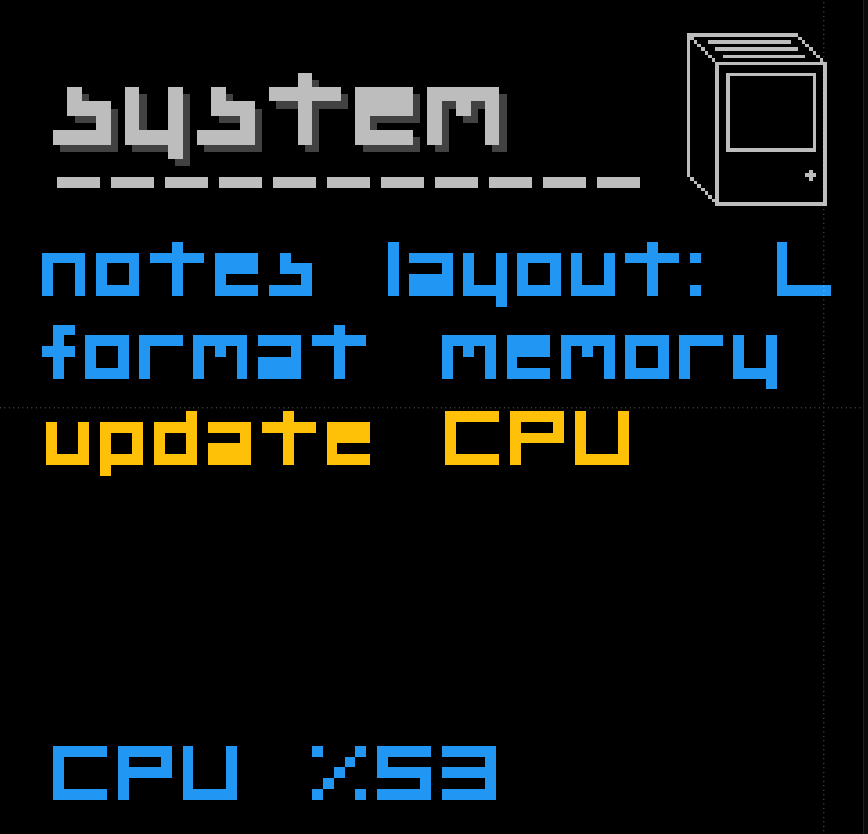
3. System Menu
Perform system-level operations:
Notes Layout – Set the keyboard layout mode:
L (Linear) or
Z (Zig-Zag)
Format Memory – Erase all saved presets and reset to factory defaults
Keep pressing the encoder to operate; no confirmation is required — use with caution.Update CPU – Use this option only when performing a firmware update.
*Changes to Note Layout and LED Intensity are saved automatically and will persist after reboot.
Performance
Keyboard
3-1 Overview
At the heart of the Uranograph are its two touch keyboards—one for each hand—which serve as the primary note input and constant modification. Speaking about the note keyboard, each of the 12 keys is a round capacitive stainless steel plate that is velocity-sensitive and pressure-sensitive, allowing extremely expressive play.
There are no moving parts; instead, a light tap triggers a note with a velocity corresponding to the force/speed of contact, and continued pressure on the plate produces aftertouch-like signals.
Continuous pressure on a key is translated into a dynamic sound modulation while the note sustains.
By default, pressing harder will open up the voice's VCA/low-pass gate, increasing volume and brightness (much like bowing a more complex string increases loudness and intensity).
This default routing makes the Uranograph respond organically – you can shape each sustained note's intensity in real time. Notably, the Uranograph's keyboard is MPE-inspired but not full MPE – meaning each note has independent pressure (polyphonic aftertouch) and instantaneous articulation.
However, the device uses its internal architecture for expression rather than requiring MPE messaging.The playing experience is akin to performing on a string or wind instrument: each note can be given vibrato, swells, or timbral changes through your touch alone. 3-2 Sensitivity Calibration

Since each player has a unique touch and preference for pressure sensitivity, the Uranograph includes a small trimmer on the front panel, allowing you to fine-tune sensitivity on the fly.
Turning the trimmer clockwise increases sensitivity—lighter touches produce a stronger response. We recommend starting around the midpoint for the most expressive and natural performance, which offers a balanced feel.
To calibrate the pressure sensitivity for the note keyboard:
Press and hold one of the key plates, aiming to maximize your finger's contact surface.
Slowly adjust the trimmer until the LED beneath the key turns red, indicating that you've reached the peak pressure threshold.
At this point, the system registers your maximum intended pressure and maps its internal curve accordingly. From here on, lighter and heavier touches will respond proportionally, giving you a smooth and expressive dynamic range.
3-3 Using the Touch Keyboards
To play a note, tap a key plate. The note will trigger with a volume corresponding to the strength of your tap. To sustain the note, keep your finger in contact with the plate.
While holding, varying your pressure will shape the sound—by default, increased pressure makes the note louder or brighter. Releasing the plate ends the sustain phase.
The stainless steel plates are highly sensitive, so subtle finger movements can affect tone. Each key's LED (beneath or around the plate) illuminates when touched, providing immediate visual feedback. The opaline plexiglass surface diffuses this light to reflect pressure intensity. The more you press, the brighter the LED glows—reaching red at maximum pressure.
We encourage you to spend some time exploring the keyboard sensitivity and plate layout. Getting comfortable with finger position and touch response is key to unlocking the instrument's full expressive potential.
3-4 ASR Envelope

In combination with your finger pressure, the Uranograph features a convenient AR (Attack–Release) envelope to shape each note's dynamics.
The Attack knob sets how long it takes for the envelope to rise from zero to the level defined by your initial finger pressure (i.e., the velocity of your touch).
Pressing another key while the envelope is active will not retrigger the attack phase—it continues smoothly, allowing for natural legato phrasing.
Once the attack phase ends, your finger pressure controls the sustain level in real time, giving you expressive, continuous control over each note.
When you release a key, the envelope enters the release phase and fades out over a time defined by the Release knob.
Tip for beginners:
We recommend starting with Attack set to 0%, so notes respond immediately. Focus first on shaping dynamics using finger pressure alone—this helps build a more intuitive feel for the instrument. Once familiar with pressure control, you can experiment with longer attack times to create swells and softer entrances.
3-5 P0 – Pressure modulation

P0 is a dedicated modulation source derived from the pressure applied to the note keyboard. It allows you to control various parameters in real time, simply by pressing harder or softer on the keys.For example, you can route P0 to filter cutoff, oscillator fold, or pan—so the more pressure you apply, the more that parameter responds. This adds a highly expressive, touch-sensitive layer to your performance.
A dedicated attenuation knob is available on the panel, letting you scale the modulation depth to suit your playing style—from subtle to dramatic.
P0 can be assigned from the mod destination menu.
Notes,
Scales,
Layouts
4-1 Overview
One of the most defining features of the Uranograph is its keyboard and its virtually infinite note possibilities. Unlike traditional synthesizers locked into 12-tone equal temperament, the Uranograph supports full microtonal performance, giving you complete control over pitch.Each of the 12 keys is individually tunable—you can assign any frequency to any key, with both coarse (integer) and fine (decimal) resolution. This allows for the creation of custom tunings, non-Western scales, and entirely new tonal systems.Out of the box, the instrument includes 50 preset keyboard layouts, covering traditional Western tuning, exotic scales (Arabic maqam, Indian ragas, just intonation, etc.),These serve as both powerful starting points and templates for exploration.With a single button press, you can load a completely different tuning system—opening up new harmonic worlds instantly. While most layouts map across all 12 keys symmetrically, advanced users can exploit the split-keyboard structure to assign asymmetric or dual-layered scales, enabling entirely new performance approaches.Whether you're playing traditional modes or inventing your own musical language, the Uranograph offers unmatched freedom in tuning, turning your keyboard into a true canvas for pitch design.4-2 Notes handling
When you press a key on the Note Keyboard, a chain of logic and settings determines exactly which pitch you hear. Understanding this process is important to fully grasp how the Uranograph’s tuning system works and how various controls influence the final output frequency.

Reference Tuning
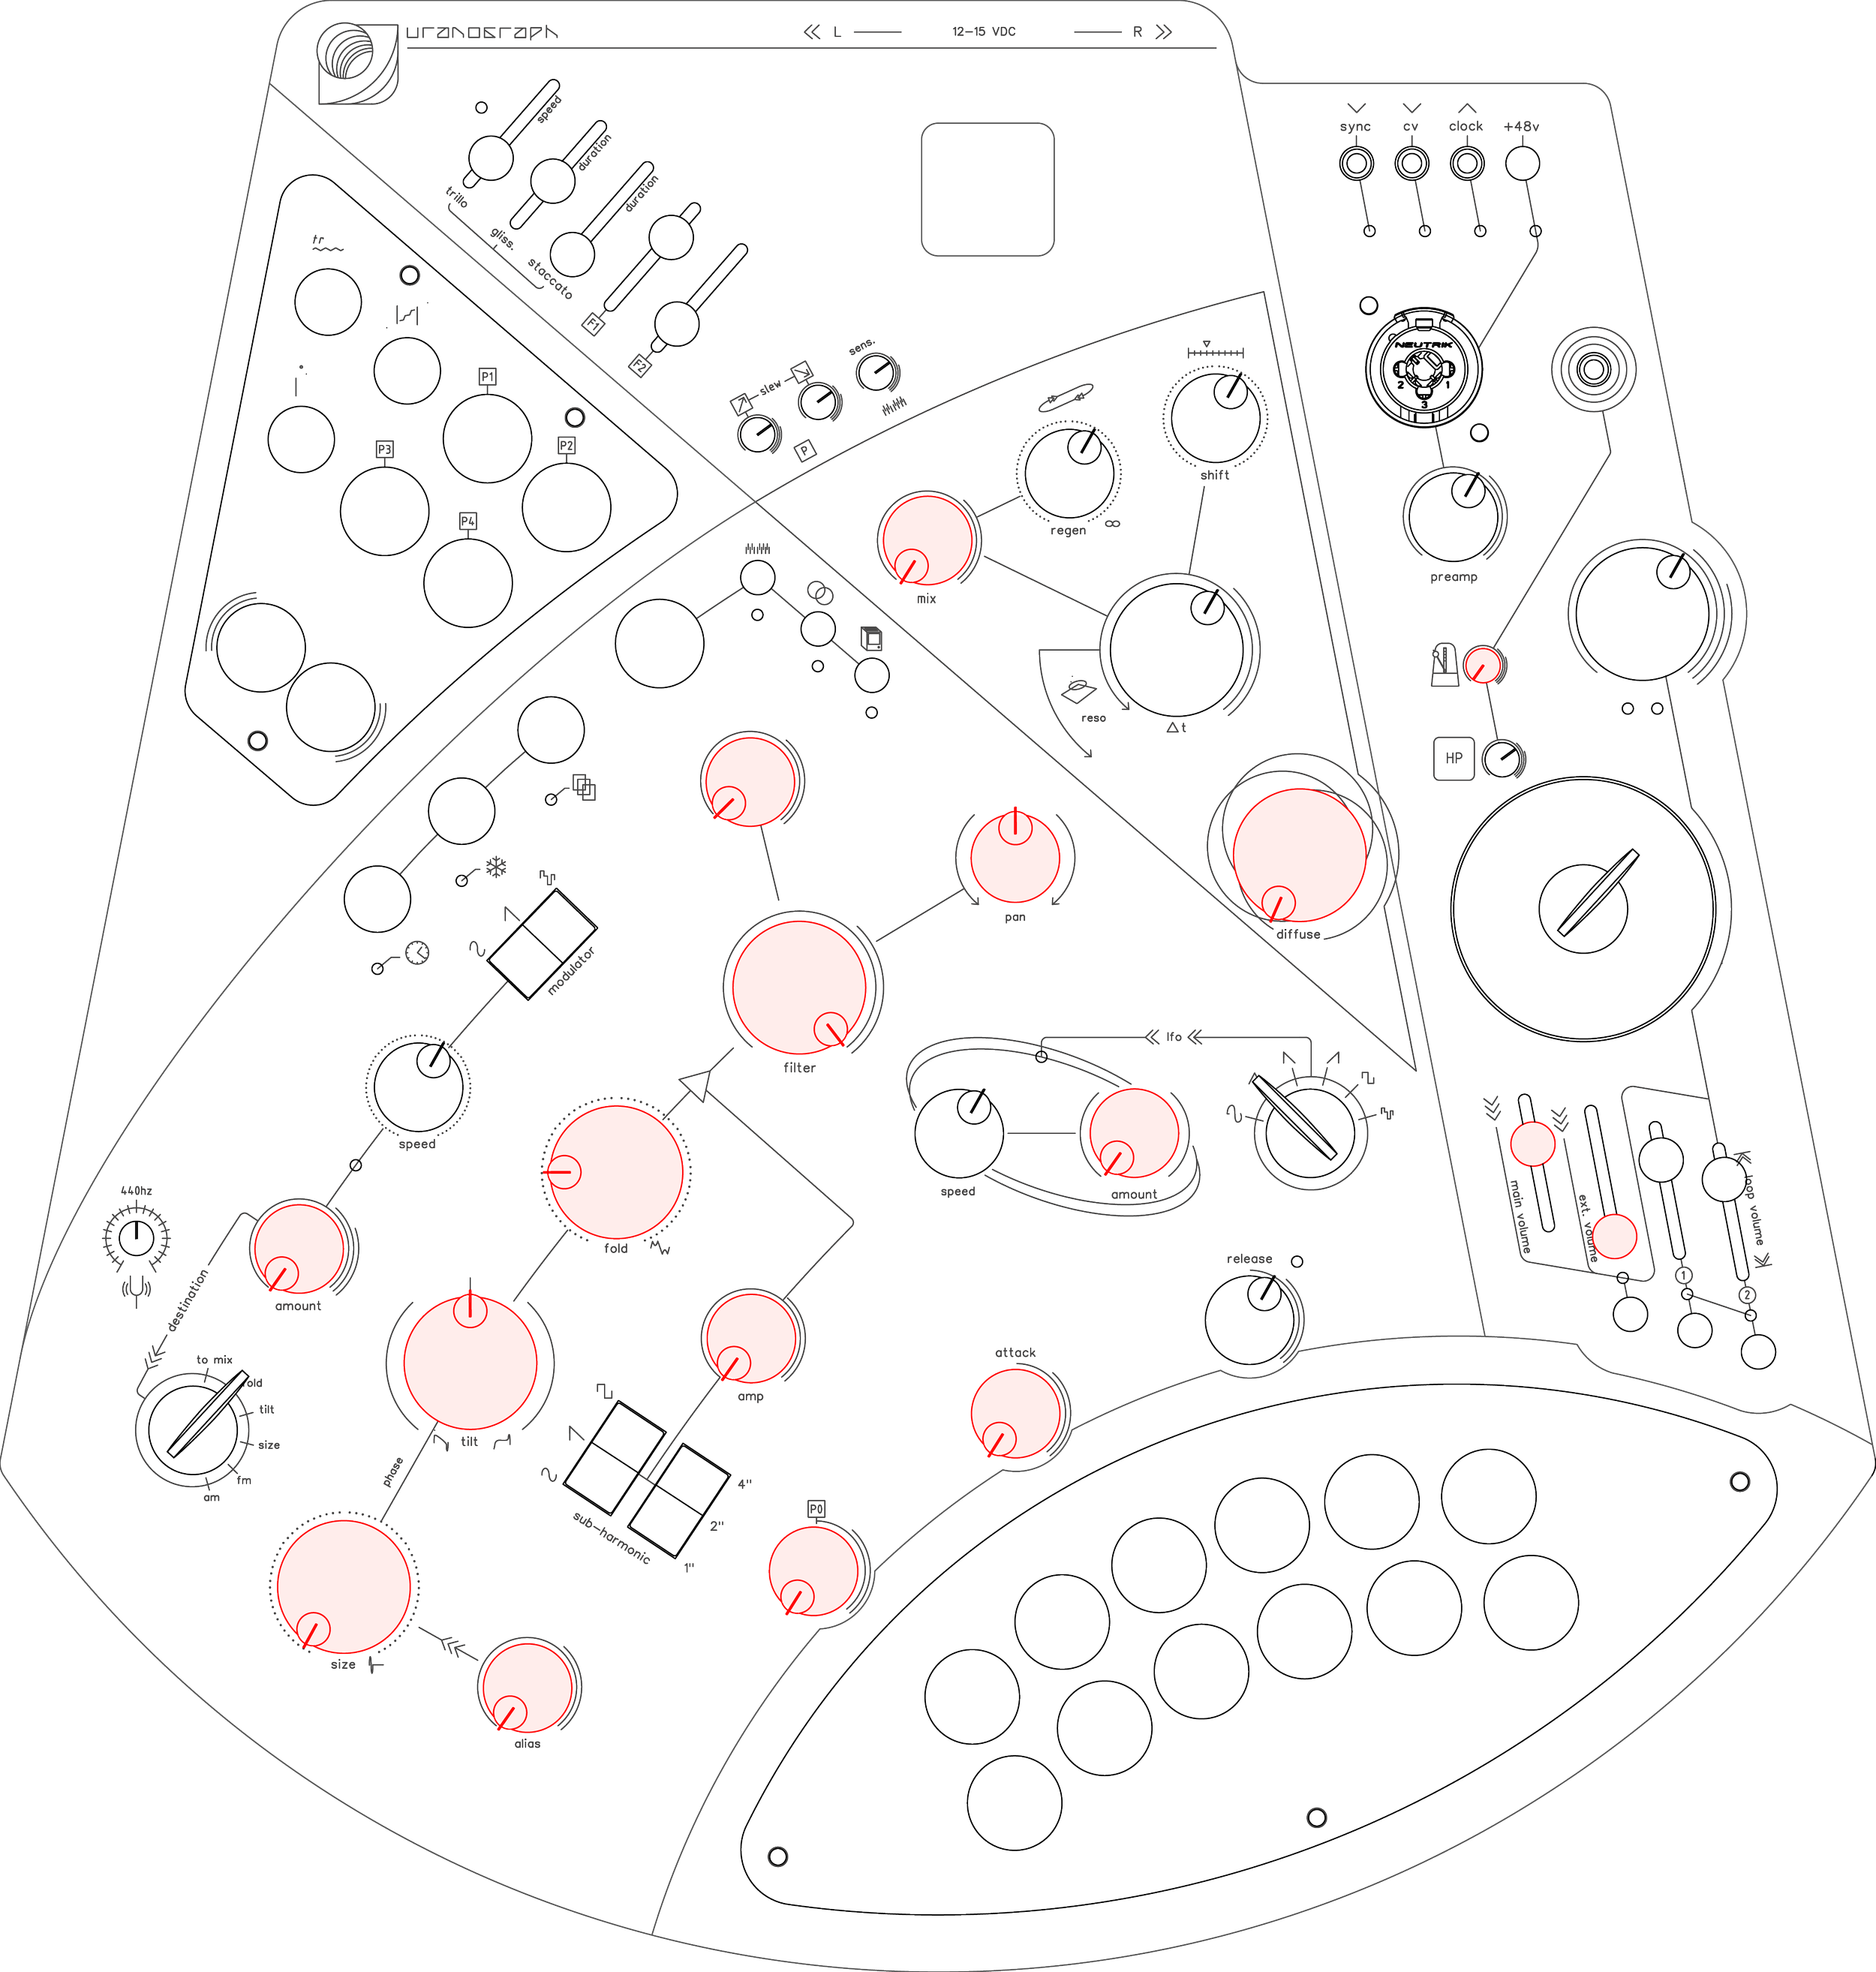
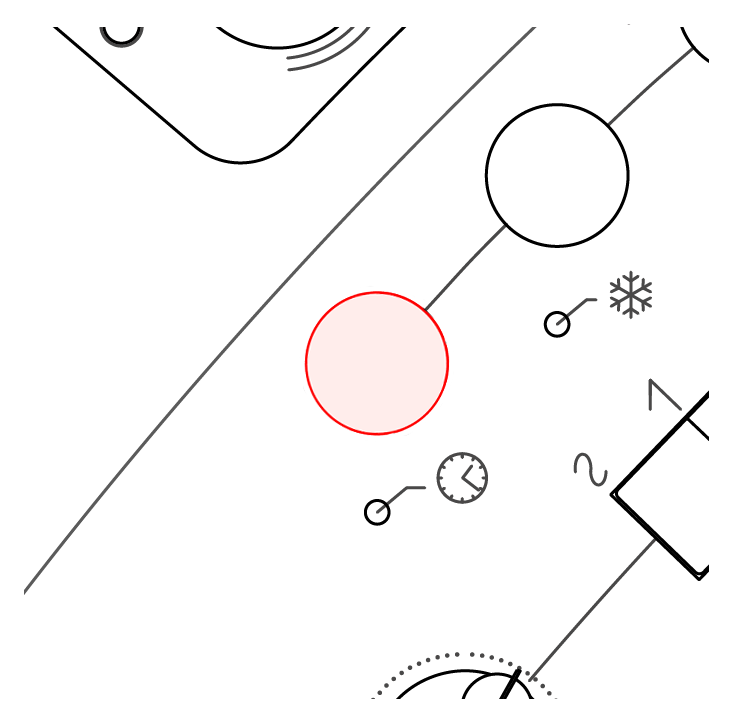
At the foundation of the instrument's pitch system is the Reference Tuning potentiometer — the small knob located in the lower-left corner of the panel, marked with a tuning fork icon.
In its center position, the Uranograph is tuned to A4 = 440 Hz, the standard concert pitch.
Turning this knob raises or lowers the base pitch of the entire instrument, allowing you to quickly retune the synth to match other instruments or tuning systems.
This setting is not saved in presets, as it is intended for on-the-fly adjustments without affecting your programmed scales.
Scale and Layout System
After the reference pitch is established, the Uranograph uses a loaded scale (keyboard layout) to assign notes to the 12 keyplates:
You select a scale from the Keyboard Menu.
That scale is then mapped across the keyplates using your selected layout mapping (Linear or Zig-Zag).
If the scale contains fewer than 12 notes, the remaining keys are automatically filled with octave-shifted notes.
Transposition System
Once a scale is loaded, the note you hear is influenced by several layers of transposition:
Global Transposition – Adjusted in the Keyboard Menu (± semitones).
Octave Plates – The leftmost touchplates shift the active octave up or down.
Western Scales & Classical Modes
0. Chromatic: C, C♯, D, D♯, E, F, F♯, G, G♯, A, A♯, B
2. Major: C, D, E, F, G, A, B, (C)
2. Natural Minor: C, D, D♯, F, G, G♯, A♯
3. Harmonic Minor: C, D, D♯, F, G, G♯, B
4. Melodic Minor: C, D, D♯, F, G, A, B
5. Dorian: C, D, D♯, F, G, A, A♯
5. Phrygian: C, C♯, D♯, F, G, G♯, A♯
7. Lydian: C, D, E, F♯, G, A, B
8. Mixolydian: C, D, E, F, G, A, A♯
9. Locrian: C, C♯, D♯, F, F♯, G♯, A♯
Symmetrical & Other Common Scales
10. Whole Tone: C, D, E, F♯, G♯, A♯
11. Diminished: C, D, D♯, F, F♯, G♯, A, B
12. Augmented: C, D♯, F♯, A
13. Major Pentatonic: C, D, E, G, A
14. Minor Pentatonic: C, D♯, F, G, A♯
15. Blues: C, D♯, F, F♯, G, A♯
16. Prometheus: C, D, E, F♯, A, A♯
17. Hungarian Minor: C, D, D♯, F♯, G, G♯, B
18. Enigmatic: C, C♯, E, F♯, G♯, A♯, B
19. Arabic: C, D♭, E, F, G, A♭, B
Middle Eastern / Arabic / Persian
20. Maqam Rast: C, D, E½♭, F, G, A, A#
21. Maqam Bayati: C, D½♭, D#, F, G, G#, A#
22. Maqam Saba: C,D½♭,D#, E½♭, G, G#,A#
23. Maqam Hijaz: C,C#, D½#, F, G, G#,B½♭, B
24. Persian: C, C½♯, E, F, G, G#, B
4-3 Keyboard layouts
The Uranograph comes preloaded with 50 keyboard layouts that set the foundation of the frequency emitted from any key of the note keyboard.
The lists represent a wide range of musical traditions — from standard Western scales to microtonal, experimental, and non-Western tunings.
You can use any of these layouts as a starting point by selecting them from the Keyboard Menu, and then freely customize individual notes to create your own unique tuning systems.
African Scales
25. Kwela: C, D, F, G, A
26. Pygmy: C, D# G, A#
27. West African: C, D, E, G, A, B
28. Araray (Ethiopian): C, D, D#, F, G, A,A#
29. Ku Ghana: C, D, F, G, A
Asian Scales (Chinese & Japanese)
30. Chinese Gong: C, D, E, G, A
31. Japanese Diatonic: C, D, E, G, A, B
32. Japanese Insen: C, D♭, E, G, A#
33. Hirajoshi: C, D, D#, G, A
34. Chinese Pentatonic: C, D, F, G, A
Indonesian / Gamelan Scales
35. Slendro: C, D#+, E#+, G-, A
36. Pelog: C, C#+, E, G-,A
37. Selisir: C, D, E+, G-, A
38. Sundanese: C, C#+, E+, G-, A
39. Javanese: C, D+, E+, G-, A♯
Microtonal & Xenharmonic Systems
40. Quarter Tones: C, C¼♯,C♯… (48-TET scale)
41. Third Tones: C, C⅓♯, C⅔♯, D, … (36-TET)
42. Five-Tone: Divides octave into 5 equal parts
43. Seventh Tones: 7 divisions per octave
44. Eighth Tones: 8 divisions per octave
45. Ninth Tones: 9 equal divisions
46. Eleventh Tones: 11-TET
47. Thirteenth Tones: 13-TET
48. Seventeenth Tones: 17-TET
49. Nineteenth Tones: 19-TET
4-4 Layouts Mapping
By default, when a scale is loaded, the notes are assigned to the keyboard following a specific layout order. This behavior is defined by the "Keyboard Layout" setting in the System Menu [section 2], where you can choose between two options:
L – Linear Layout
Mapping order (bottom to top):
7, 8, 9, 10, 11, 12
1, 2, 3, 4, 5, 6

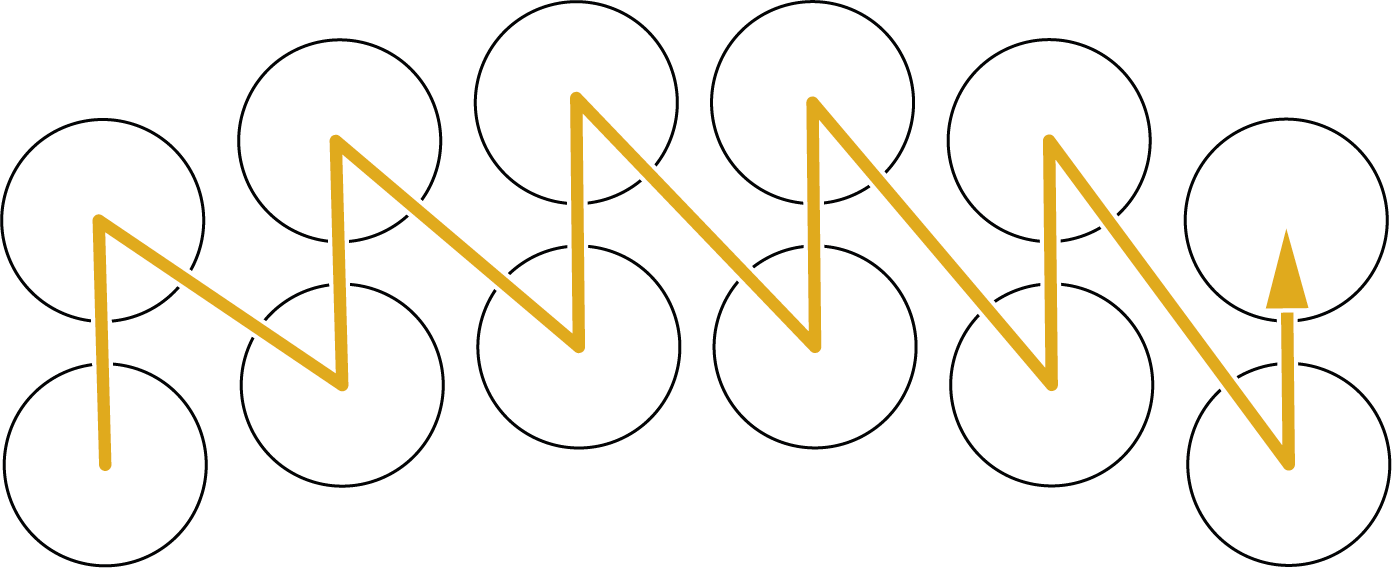
Z – Zig-Zag Layout
Mapping order (alternating columns):
2, 4, 6, 8, 10, 12
1, 3, 5, 7, 9, 11
When loading a scale with fewer than 12 notes, the remaining keyplates will automatically be filled with octave duplications, ensuring the entire keyboard remains playable. Depending on your layout choice, these octave shifts may land in different physical locations — another reason to experiment with both modes.
4-5 Keyboard menu
When the Uranograph powers on, the first screen you’ll see is the Keyboard Menu. You can, in every moment, access it by pressing the keyboard drawer icon on the panel.
This menu gives you deep control over the pitch structure of the instrument, allowing you to edit not just notes, but frequencies, scales, and transpositions with both precision and flexibility.
What You Can Do in the Keyboard Menu
Set the current keyboard layout/scale
Set the note name and its exact frequency
Apply a global transposition across the keyboard
Adjust pitch using integer and decimal resolution
Set alias transpositions for harmonizer voices
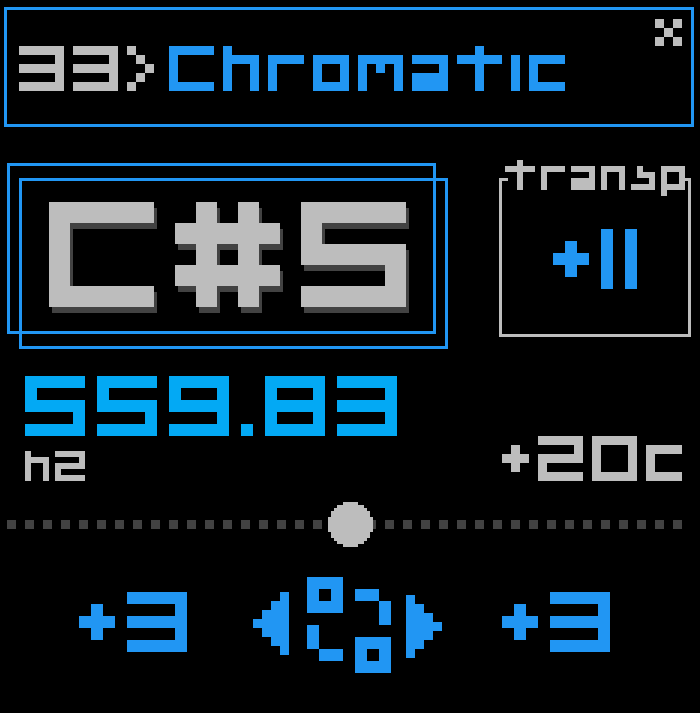
In the upper part of the screen, when you press a key, a yellow pressure bar appears—this represents the current pressure intensity of your touch in real time.Just below it, a dotted bar shows your deviation from the nearest Western (12-TET) note. This is especially useful when playing microtonal tunings or using pitch glide, as it gives you a precise visual indication of how far the played pitch is from the nearest semitone.
Above the bars, the cent deviation is displayed numerically, ranging from -50 to +50 cents, allowing you to fine-tune or monitor pitch bends and micro-adjustments with high precision.
4-6 Note edit
One of the Uranograph's most powerful features is then the ability to create fully custom keyboard layouts, setting the frequency of each individual note by hand. Both coarse (integer) and fine (decimal) adjustments are available, giving you complete control over pitch.
This level of control transforms the Uranograph into a true microtonal instrument, giving you the tools to escape traditional temperament and explore entirely new musical languages.
Select a scale from the Keyboard Menu.
Touch a key on the performance keyboard to select the note you want to modify.
In the menu:
Highlight the note name to change the pitch in semitones (Western tuning).
Highlight the integer or decimal frequency values to fine-tune the pitch or introduce microtonal offsets.
Press the encoder to enter edit mode, then turn the encoder to adjust the value.
You'll see both the note name and frequency update in real time.
When editing a note, keep in mind that the pitch you hear and see on the screen (e.g., C♯5 in the example image) is the result of multiple layers of transposition, including:The note frequency stored in the selected keyThe Tuning Reference trimmer (bottom-left knob with tuning fork icon)The Global Transposition setting (in the Keyboard Menu)The Octave transposition set via the Octave Plates
To ensure you’re editing the exact pitch as intended, follow these steps for a neutral tuning state:Set the Tuning Reference trimmer to its center position (A4 = 440 Hz)Remove any Global Transposition from the Keyboard Menu (set it to 0 semitones)Set the Octave Plates to zero transposition (center position)
Once these are neutralized, the note and frequency shown on the display will correspond exactly to the stored value for that key—making editing precise and reliable.
Once a change is made, an asterisk (*) will appear next to the scale name, indicating that the layout has been modified.
All tuning changes are saved within your preset, so your custom scales and microtonal settings are retained across sessions.
Switching to a different scale will reset any modifications made to the previously edited scale. This also provides a quick way to restore the selected scale to its factory version.
Each preset stores its own independent copy of the current scale layout.
This means that scale edits are not shared across presets — if you modify a scale in one preset, that change will not carry over to others. Every scale is saved as part of the preset itself.
This approach ensures that each preset can contain its own unique tuning system, fully preserved and isolated from other programs.
Control
Keyboard
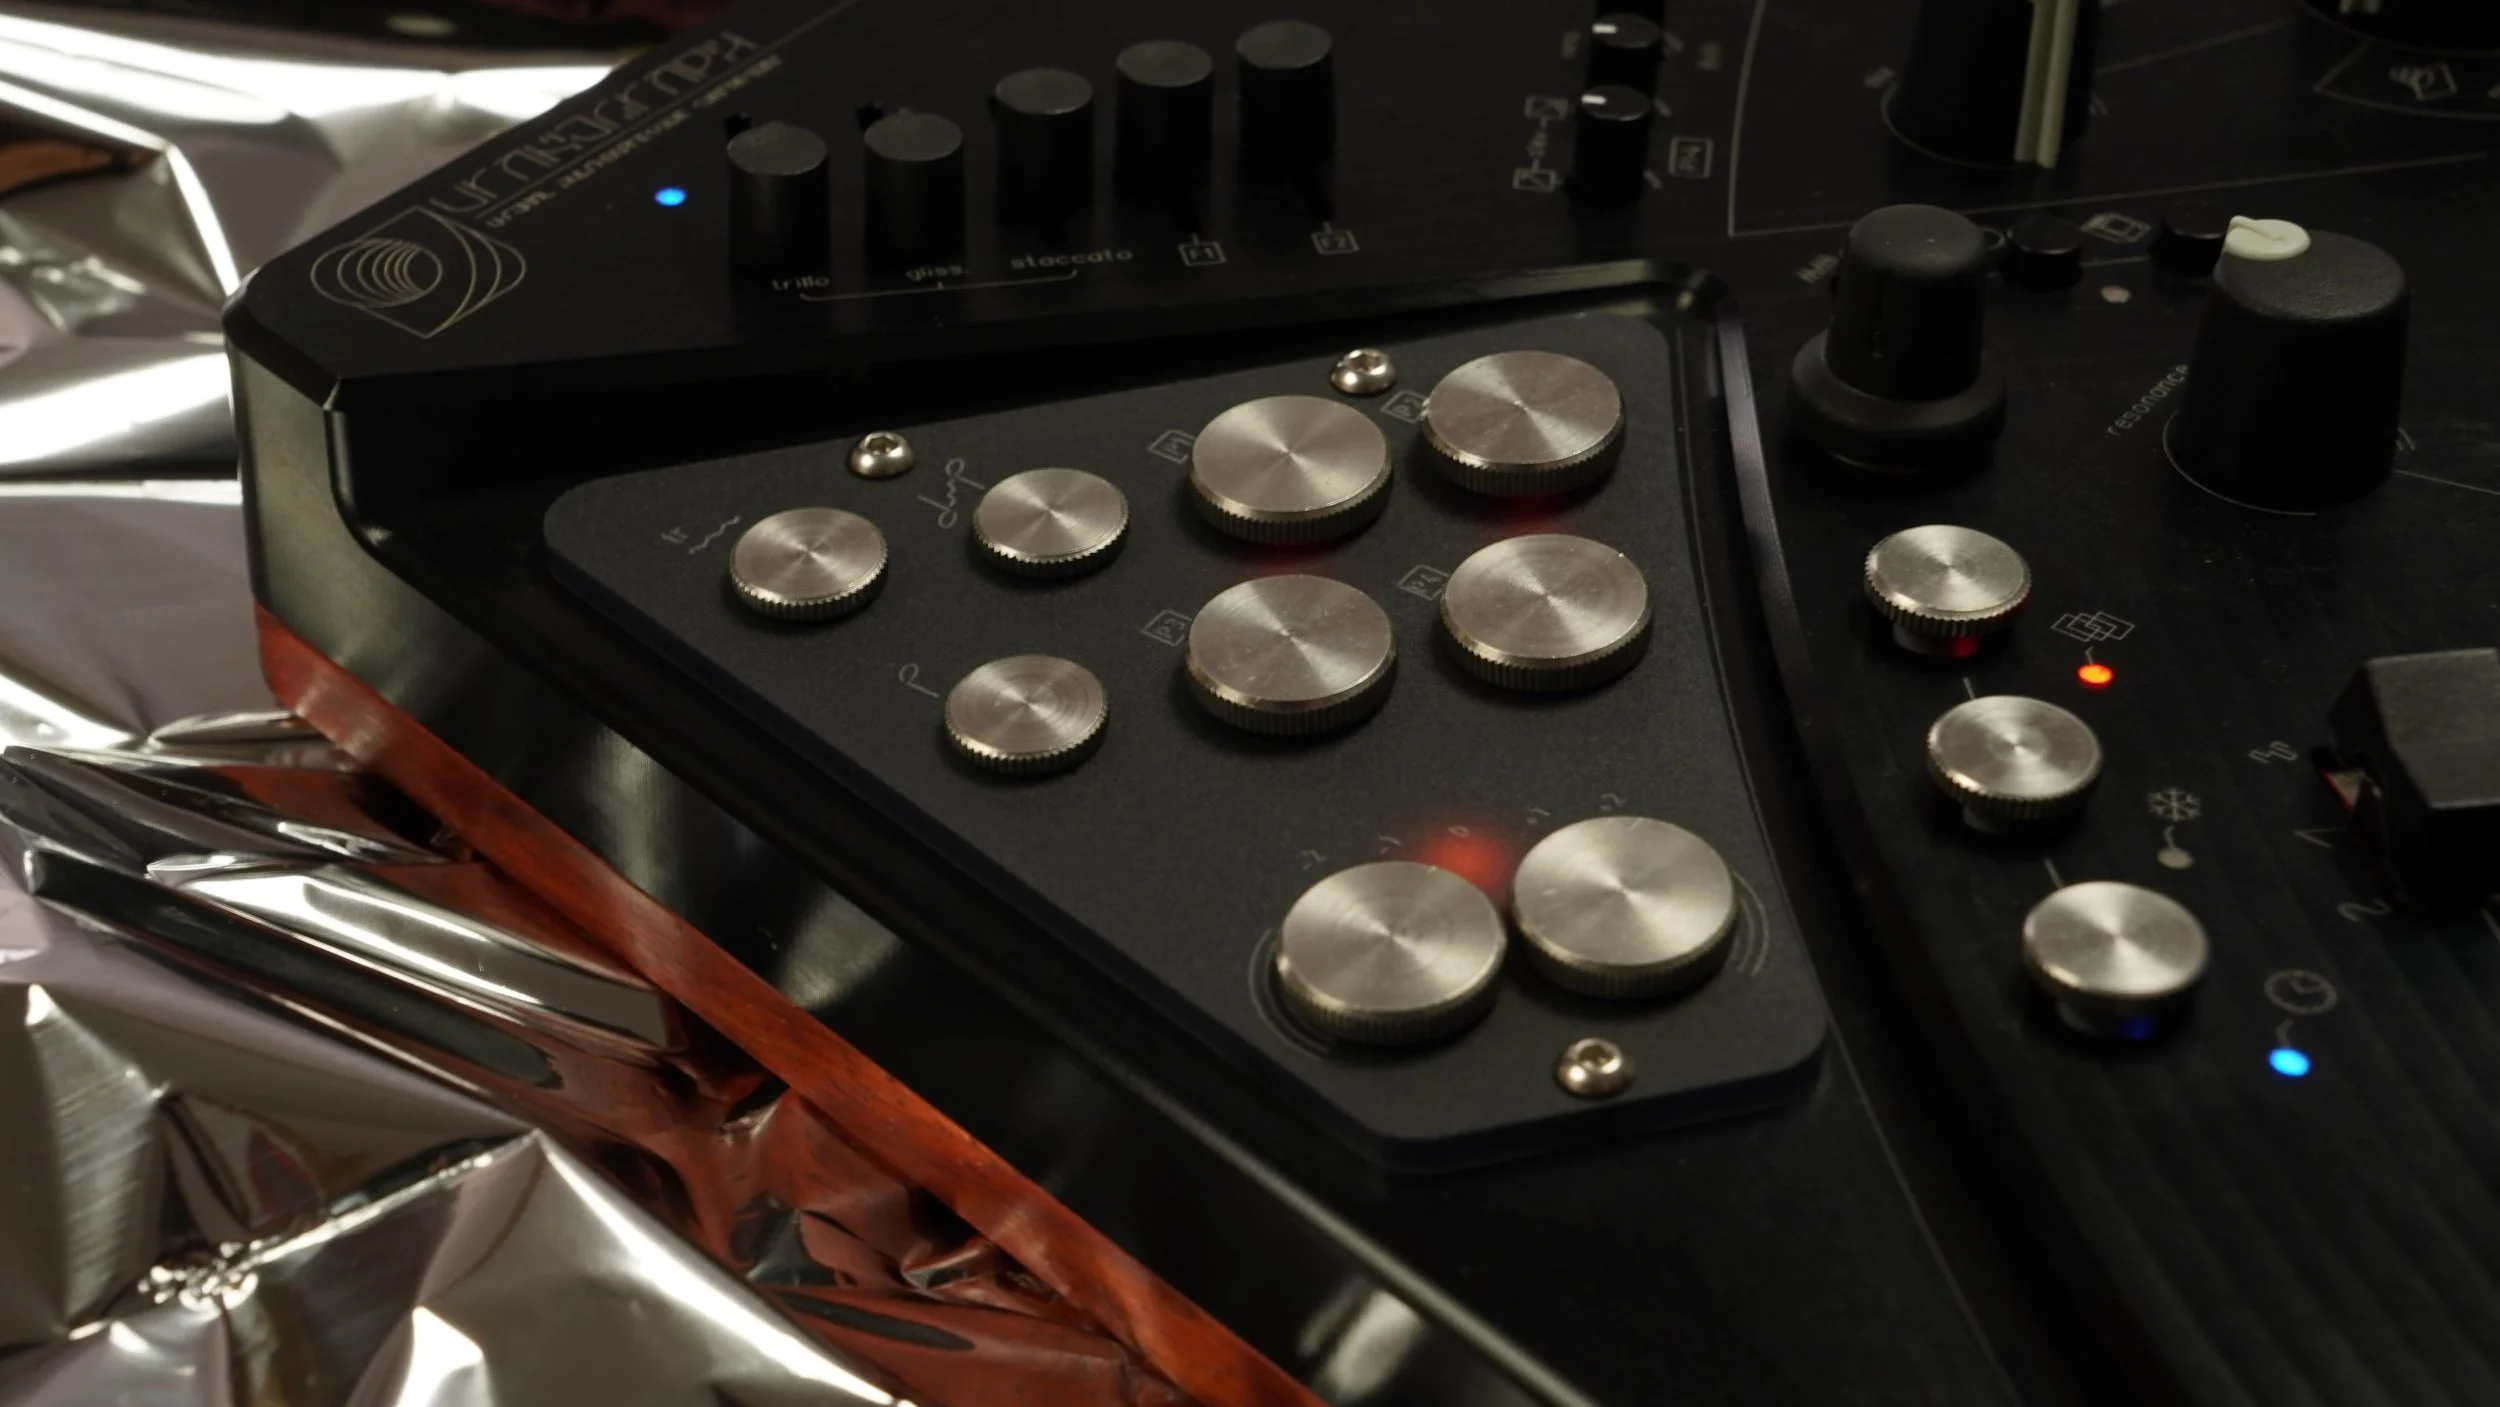
5-1 Overview and ergonomics

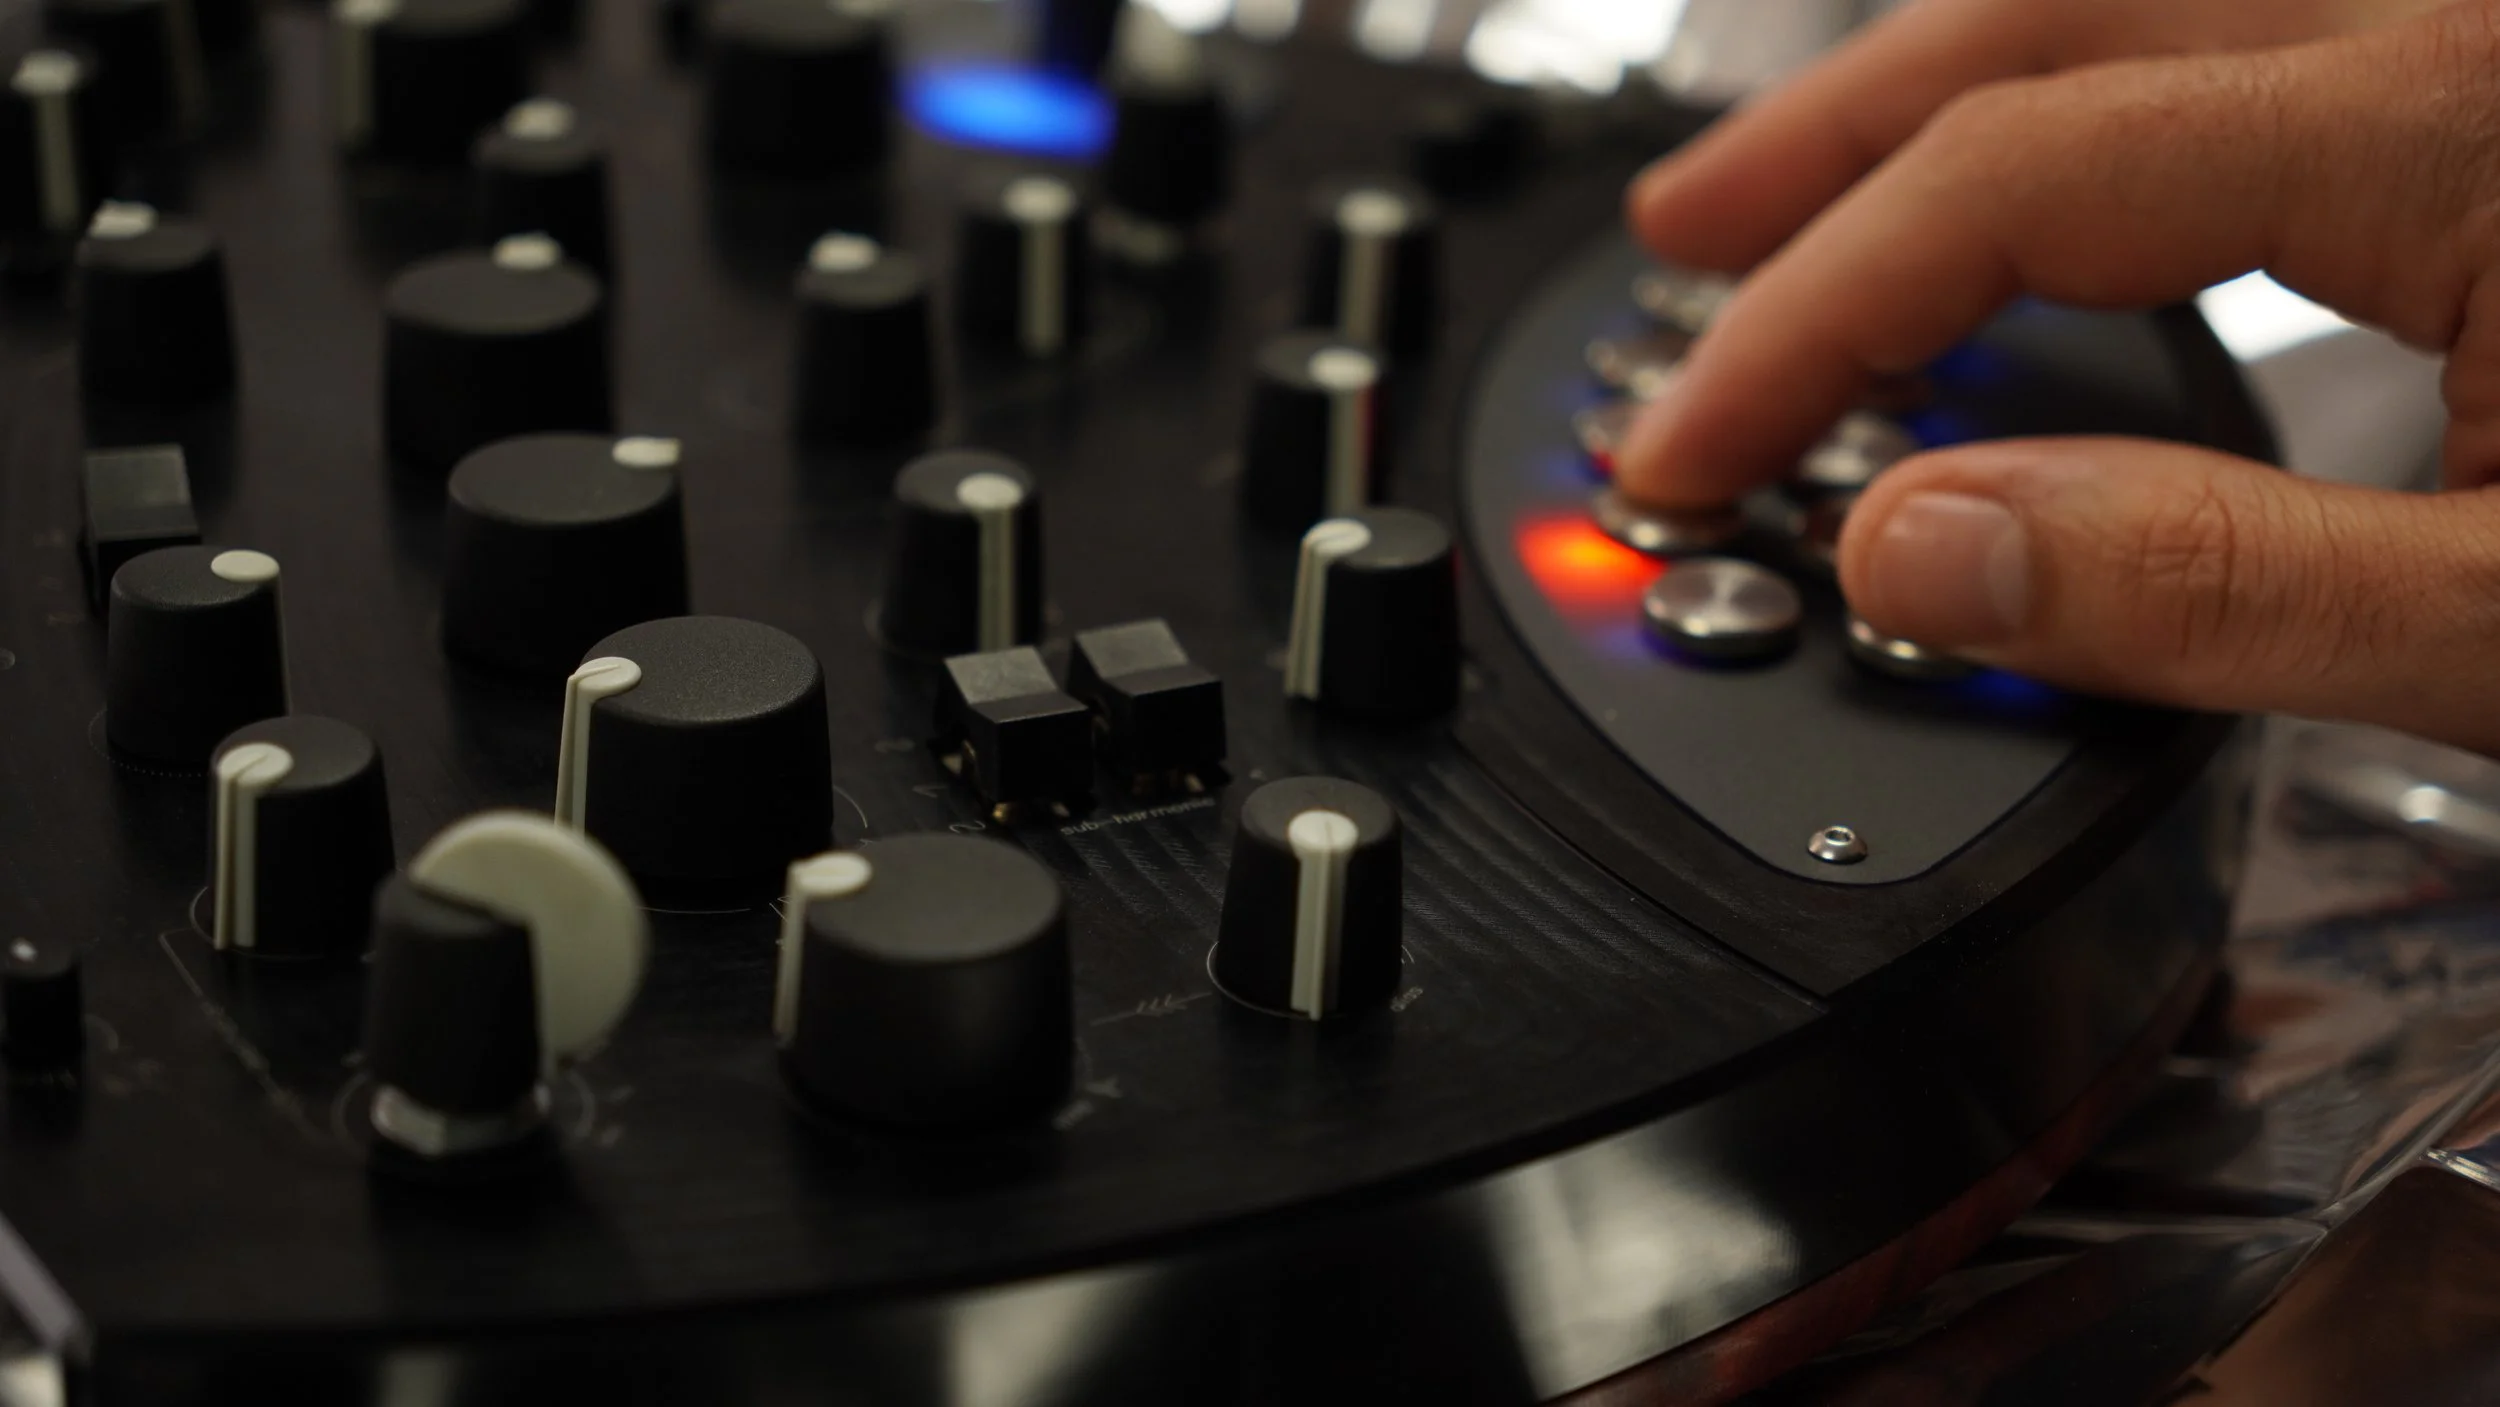
In the top-left corner, Uranograph provides a secondary control keyboard – a set of specialized touch plates divided into three sections – for additional performance modulation. These replace traditional wheels or faders with a more immediate, gesture-oriented interface. The sections are: Articulation Plates, Octave Shift/Bend Plates, and ModKeys.To fully appreciate the ergonomic design of the control keyboard, keep in mind that it's intentionally laid out for a specific left-hand posture and finger distribution:The thumb naturally rests over the three side plates: Memory, Hold, and Clock.The index and middle fingers are positioned over the ModKeys and Octave shift plates.The ring and little fingers reach the Articulation plates (Glissando, Trillo, Staccato).
This layout allows for intuitive control without repositioning the hand, enabling expressive gestures while keeping your playing fluid and continuous.Take this as advice and a starting point; feel free to experiment with your preferred hand position!5-2 Articulation plates
These three touch plates give you instant access to advanced phrasing techniques. They are labeled and conceptually correspond to Glissando, Trillo, and Staccato, mirroring common articulations in stringed instruments.
To activate an articulation, briefly tap the corresponding touch plate.
The LED beneath the plate will light up, indicating that the articulation is engaged.
To deactivate it, tap the same plate again—the LED will turn off.
Depending on its current state, you can hold a touch plate to activate or deactivate the articulation temporarily. The articulation remains active only for the duration of the hold and returns to its previous state once released.
This means you can either briefly invoke an articulation for specific notes or lock it in if you want a whole passage to be staccato without continuously holding the plate.
5-3 Octave shift & pitch bend
Two additional plates handle quick octave transposition and pitch bending. One plate shifts the keyboard up one octave, and the other shifts it down one octave.
Like the articulations, these can work momentarily (hold to stay transposed while touched) or latch (tap to toggle the octave shift on).
This allows immediate extension of the playable range beyond the physical 12-key layout – for instance, tapping the "Octave +" plate will raise the pitch of all keys by 12 semitones, effectively moving you up an octave until you toggle it off. If needed, stack the octave plates (e.g., hitting the up octave twice goes +2 octaves).
The two plates touching together enable the Uranograph's Pitch Bend mode. Pressing both the Octave Up and Octave Down plates at once or between those will activate bend functionality: in this mode, sliding or moving between the two plates produces a smooth pitch bend, similar to bending a string or using a pitch wheel. This is extremely useful for guitar-like bends or vibrato.
When you release both plates, pitch returns to normal. This innovative approach means you can achieve expressive bends without a dedicated wheel, using the same fingers that control octaves.


Glissando Plate
When engaged, this enables smooth pitch slides between notes.
In practice, if you activate the glissando, pressing two keys together will cause the pitch to glide continuously from the last note to the new note, rather than jumping discretely. It's like a fretless slide – great for portamento or meend (in Indian music) effects.
Staccato plate
This plate shortens the duration of notes and applies a percussive envelope. When engaged, notes bypass the sustain phase entirely—featuring a fixed attack and a fast, natural decay curve that mimics the response of a Vactrol-based VCA.
The result is a snappy, plucked articulation, ideal for fast, detached playing or adding sharp rhythmic definition to your phrases.
Use it to transform legato lines into crisp, percussive textures with a single gesture.
Trillo Plate
The Trillo Plate enables a fast, expressive alternation between two or more pressed notes. While it shares similarities with an arpeggiator, Trillo is more dynamic and responsive, reacting in real time to your touch and pressure.
You can keep the Trillo Plate engaged at all times—it will only activate when two or more notes are held simultaneously. This allows you to switch effortlessly between normal monophonic playing and trilled or chordal motion without breaking your flow.


Trillo + Hold Plate: Sequencer-Like Mode
Activating the Hold Plate (marked with a snowflake icon) locks the last note you played, keeping it active indefinitely.
While Trillo is engaged, ithe Hold Plate unlocks a special "infinite cycling" mode, behaving similarly to a step sequencer:
You can remove a note from the Trillo loop with a quick tap of its key.
You can add a note or adjust its intensity by pressing and holding a new key—its aftertouch pressure determines the volume or prominence of that note in the loop.
The held sequence pattern will be saved along with the saving of a preset.
Articulation Faders
The Uranograph provides three dedicated sliders on the panel to adjust the behavior of articulations.
These fader controls allow you to fine-tune parameters such as glissando glide rate (how fast or slow the pitch slides), trillo speed (the rate of alternation in division or multiplication of the global clock), and staccato decay length (how short the note becomes). You can customize how each expressive technique responds by tweaking these, tailoring the instrument to your playing style.
These settings can be saved per preset and adjusted on the fly.
5-4 ModKeys
The Uranograph includes two assignable modulation touch plates (P1 - P2) called ModKeys. These are pressure-sensitive controllers that act like customizable macro controls for sound modulation. Each ModKey doesn't directly trigger a note; instead, pressing a ModKey sends a modulation signal (with an amount corresponding to pressure) that can be routed to any synthesis parameters you choose. In essence, they are two extra "control knobs" under your fingertips, but implemented as touch plates you can press. Pressing a ModKey will then increase the assigned parameter according to how hard you press, and you can even press multiple ModKeys simultaneously to tweak several things at once.
Pressing the Hold Plate while adjusting a ModKey will lock its current pressure value indefinitely, allowing you to "freeze" a modulation amount for hands-free control.
To unlock the held modulation:
Press the same ModKey again
Then release the Hold Plate
This lets you maintain a specific modulation level—such as filter movement or tilt—without needing to keep pressure on the ModKey.
ModKeys assignment
The ModKeys are fully assignable via the Modulation Menu:
Press the Modulation button (marked with a two-circle graphic).
Use the encoder to scroll until you see the P1 or P2 menu (corresponding to ModKey 1 and 2).
Once a destination is highlighted in yellow, press the encoder to select it.
Turn the encoder to choose the desired modulation destination.
Press the encoder again to confirm and exit the assignment.
You can also adjust the maximum modulation amount for each assignment from the same menu in the same way.
Like the articulation plates, ModKeys respond continuously to pressure, enabling excellent real-time control – for example, you could slowly press deeper on a ModKey during a note to gradually introduce an LFO effect or open the filter. Using ModKeys in combination allows complex timbral changes on the fly.
ModKey assignments and their maximum modulation depths are stored per preset so each sound can have tailored macro controls. This encourages creative sound design: one preset's ModKey1 might bring in vibrato, while another preset's ModKey1 might sweep an oscillator's timbre parameter, etc.
The P3 and P4 touch plates are reserved for lopping; we will discuss that in the looper section.

ModKey Slew Control
Two small trimmers on the panel allow you to quickly adjust the attack and decay slew rates for ModKey pressure modulation.
These controls determine how smoothly or sharply the modulation responds to changes in finger pressure, helping you fine-tune the feel from snappy and immediate to slow and expressive.
Sound
Engine

6-1 Overview
Uranograph's sound engine is built around a synthesis approach that merges two historically distinct, yet beautifully complementary, worlds: digital phase distortion and West Coast modular synthesis.From the Casio CZ-series of the 1980s, phase distortion introduced a novel way to sculpt harmonics—not by filtering them out, but by reshaping the waveform at its core. It allowed sine waves to be bent, skewed, and squeezed into brighter, more aggressive tones with sharp dynamic shifts, while retaining a clear, musical identity. This digital method brought new possibilities to timbre generation without relying on analog-style filters.On the other side of the spectrum, West Coast synthesis—pioneered by Don Buchla—favored additive processes, wavefolding, and non-linear shaping, emphasizing timbre modulation directly at the oscillator stage. Instead of subtracting harmonics with filters, this approach focused on creating complexity through motion and interaction, often resulting in tones that felt alive, unpredictable, and expressive.Uranograph reimagines these two traditions as one coherent system. Phase distortion offers dynamic asymmetry and harmonic sharpness, while wavefolding brings layered textures and rich overtone structures.
By combining these philosophies into a single, continuously morphable oscillator architecture, Uranograph encourages sound design through evolution, rather than fixed architecture.There are three main controls here to shape the waveform: Size, Tilt, and Fold.
phase distortion further readings
West Coast Synthesis further readings
6-2 Size
The Size knob controls a unique form of phase warping and spectral shaping applied to the core sine wave oscillator. Functionally, it behaves somewhat like pulse-width modulation, but instead of reshaping a square wave, it warps the phase of a sine wave, compressing or expanding it without changing its pitch.
At low Size settings, the oscillator remains close to a pure sine wave—producing warm, round, and mellow tones with minimal harmonic content.
As you increase the Size, the waveform is progressively compressed in time, creating non-linear phase distortions that introduce both even and odd harmonics, while preserving the perceived pitch.
At extreme settings, the waveform becomes sharp and narrow—approaching what is often described as a spike wave: thin, bright, piercing, rich in high-frequency content with a distinctly metallic or glassy quality, yet still musical and harmonically anchored.
In simpler terms, the Size control morphs the oscillator's tone from soft and pure to complex and buzzy, all through a continuous, organic transformation. It's ideal for evolving textures, dynamic timbral control, and pushing a patch from subtle to aggressive with a single gesture.
6-3 Tilt
Tilt introduces a form of asymmetric amplitude distortion. It skews the waveform shape in one direction or the other, creating rich and distinctive timbres characteristic of classic PD synths—but with a more fluid and modern implementation.
The Tilt knob is bipolar:
At the center position, it has no effect.
Turning clockwise or counterclockwise tilts the waveform in opposite directions, distorting its symmetry.
In subtle settings, Tilt creates soft, vocal-like, or formant-rich tones—ideal for expressive, melodic content.
As you push it further, the waveform becomes increasingly slanted, introducing metallic, brassy, or edgy overtones. At extreme values, it resembles a waveform morphing toward a sawtooth, producing aggressive and harmonically rich textures.
Tilt excels at transforming a pure waveform into something complex and biting—without relying on a filter. It's particularly useful for crafting evolving, animated timbres and giving motion to otherwise static sounds.
Importantly, Tilt interacts dynamically with the Size control. Combining both will reveal a wide range of spectral behaviors—from subtle harmonic coloration to full-spectrum distortion. The two parameters modulate the waveform in complementary but non-linear ways, resulting in surprisingly organic and playable responses.
Spend some time exploring the interaction between Size and Tilt—they form the heart of the Uranograph's tone-shaping engine.
6-4 Fold
This knob introduces Wave Folding, a classic West Coast synthesis technique. Wavefolding reflects the waveform on itself once it exceeds a certain amplitude threshold, creating new harmonics and often a buzzing, complex tone. At zero Fold, the core oscillator is clean. As you increase Fold, whenever the wave's amplitude exceeds the threshold, it "folds" back, resulting in rich, nonlinear distortion and added overtones. Low levels of Fold add a touch of brightness or grit, while high levels produce intense, almost metallic or distorted textures. Fold is excellent for transforming a simple tone into something much more harmonically dense and textured. It can interact dynamically with envelopes and playing intensity because it's tied to the oscillator's amplitude.
Remember that the Fold control operates directly on the amplitude of the waveform. In the first quarter of the knob's range, it behaves much like a volume control, simply increasing the output level without altering the waveform's shape.
Using the Size, Tilt, and Fold controls in combination, you can extensively sculpt the core oscillator's waveform – from pure tones to complex spectra. These controls are usually real-time knobs on the panel, so you can tweak your waveform as you play, essentially "morphing" the oscillator's shape on the fly.
All three affect the oscillator in a phase-morphing additive manner (they don't just mix in a static waveform; they truly warp the sine wave's phase/amplitude properties). This means the core timbre generation is flexible and doesn't rely solely on downstream filtering for tone shaping.
6-5 Alias
Since key combinations on the Uranograph are reserved for articulations, it takes a different approach to polyphony—one that doesn't depend on pressing multiple keys at once.
Instead, the instrument introduces a clever system called harmonic aliasing, allowing a single key press to trigger up to three oscillators playing in harmony.
At the core of this system is the main oscillator, which can be "aliased" into two additional voices. These voices are not separate instruments but clones of the original oscillator, sharing the exact same waveform shape—including all active Size, Tilt, and Fold settings. This ensures that even when you're playing stacked notes, the sound remains cohesive and harmonically unified.
What makes this approach powerful is that each of the additional voices follows the root pitch at a user-defined interval, quantized chromatically.
You can set these intervals using either the dedicated F1 and F2 faders on the panel or directly from the Keyboard Menu, depending on your preferred workflow.
Both methods allow you to define intervals in semitones, from -12 to +12, relative to the key you're pressing.
The overall intensity of this polyphony—the blend between single voice and full chord—is controlled by the Alias knob.
When Alias is turned all the way down, you’ll only hear the root oscillator. As you increase it, the duplicated voices become more present.
One particularly expressive trick is to assign the Alias parameter to a ModKey, keeping the Alias knob at zero. This way, you can fade in chords dynamically using pressure—pushing harder brings in harmonized voices in real time.
There’s more than one way to use aliasing. If you leave the additional voices untransposed, they’ll play the same pitch as the main voice, but slight detuning can create lush, subtle chorusing or phasing effects. On the other hand, with defined intervals, each key can behave like a programmable chord button.
Some keys can remain monophonic, while others deliver full triads or exotic harmonic structures.
Importantly, these alias settings are stored per key. You can program each note independently, building a keyboard where every key plays its own unique chord or harmony.
To reset a key back to monophonic, simply set its alias intervals to zero.
Though the Uranograph is fundamentally monophonic in terms of its envelope and signal chain, this harmonic aliasing gives you access to true paraphonic behavior—full, responsive chords with unified modulation and expression, all from a single touch.
6-6 Sub Oscillator
The sound core generator also includes a dedicated Sub-oscillator to reinforce the low end. A waveform selector switch lets you choose between three wave shapes for the sub: sine, saw, or square. This allows the sub tone to stay pure (sine for a fundamental bass boost) or add more edge (saw or square for buzzy sub textures). There is also an octave switch for the sub: options include unison (same pitch as main oscillator), one octave below, or two octaves below the main oscillator.
Unison mode doubles the core oscillator, thickening the sound, whereas -1 or -2 octave modes provide deep bass reinforcement.
The sub oscillator is mixed in with the main oscillator before the filter. The sub amp knob controls how loud the sub is relative to the primary signal (so you can blend just the right amount of low end).
Using the sub, you can ensure even bright, heavily warped sounds still have a solid fundamental underpinning. For instance, if your main oscillator does crazy phase distortion that thins out the fundamental, the sub will add that body back in.
6-7 Modulation Oscillator
Rounding out the oscillator section is the Modulation Oscillator, which serves dual purposes.
This is essentially a third (or fifth, counting each alias voice) oscillator that can operate as either an audio source or a modulation source depending on settings.
It tracks the keyboard pitch (so it's tuned to the note you play, like the other oscillators), but has an independent frequency control (Speed knob) and can go from extremely low frequencies (0.001 Hz) to audio-rate (up to ~3000 Hz).
Key panel controls for the mod oscillator include:
- A Speed knob (continuous) – sets the base frequency of the mod oscillator. For example, at a mid setting, the mod osc might match the note's frequency; turning it down might make it a fraction of the note (sub-audio LFO speeds), turning it up can make it several times higher (FM-style). The range is wide: from 0.001 Hz (essentially a very slow LFO that could take many minutes per cycle) to 3 kHz (well into the audible range for FM).
- A Waveform selector – a switch to choose the mod oscillator's waveform. Options include Sine, Saw, or Random (noise). Sine is useful for smooth vibrato or FM, Saw for ramp modulations or harsher tones, and Random generates either a sample-and-hold style stepped random voltage (if running slow) or a noise spectrum (if run at audio rates). This flexibility lets the mod osc emulate classic LFO shapes or add noisy mod textures.
- A Modulation Target selector – this is a rotary control that selects what the mod oscillator will modulate in the synth engine. The available targets include AM (Amplitude Modulation), FM (Frequency Modulation), Size, Tilt, Fold, or mix. In AM mode, the mod oscillator will modulate the amplitude of the main voice (producing tremolo at low speed or ring-modulation/brutal distortion at audio speed). In FM mode, it will modulate the pitch of the core oscillator (producing vibrato at low speed or classic FM sidebands at audio rates). In Size/Tilt/Fold modes, the mod osc directly modulates those respective parameters of the core oscillator – for example, in Mod→Fold mode, the mod oscillator will dynamically increase/decrease the Fold amount at the Speed rate, leading to a kind of time-variant wavefolding (like adding motion to the timbre). At low speeds, this is a periodic timbre sweep; at audio rates, it can insert complex sidebands and grit into the waveform (since it's effectively FMing the wavefolder threshold). Finally, Mix mode likely means the mod oscillator is mixed in as an audible oscillator – i.e., it becomes an additional fifth voice added to the output.
- A Mod Amount knob – this knob controls the depth or intensity of the modulation oscillator's effect. If the mod osc is targeting AM, the Mod Amount sets how strong the amplitude modulation is (0 = no AM, max = full on/off tremolo or ring mod). For FM, it sets the frequency modulation index (how much the pitch deviates). For Size/Tilt/Fold targets, it sets how far the mod oscillator pushes those parameters. If the target is Mix, the Mod Amount becomes the volume level of the mod oscillator in the mix. This single knob thus gives a convenient "one-knob control" for dialing in the desired modulation intensity or mix level of the mod osc.
6-8 Low Pass Filter
The Uranograph doesn't use a traditional filter as its primary tone shaper – oscillators' spectra can already be changed with other parameters– but it does include a Low-Pass Gate / VCA hybrid filter stage after the oscillator. This stage serves two purposes: it amplifies and envelopes the sound (like a VCA) and provides a variable low-pass filter effect. The design is similar to an LPG in that high frequencies are also damped when the amplitude is low, mimicking how acoustic sounds naturally lose brightness as they decay. The controls for this stage likely include:
Filter knob: This sets the base cutoff frequency of the low-pass gate. It adjusts how much high-frequency content is allowed when the gate is fully open. At maximum, the LPG acts almost like a straight VCA (full bandwidth); at lower settings, it mellows the tone even when held open. This is useful for setting the overall brightness balance of the instrument, especially in combination with the harmonic content from Size/Tilt/Fold.
Resonance knob: This adjusts the filter's resonance from none to almost self-oscillation. At moderate resonance, the filter/LPG will add a gentle emphasis around the cutoff frequency, giving accents a bit of bite or ring. At high resonance, it can produce a pronounced peak or even a sine tone.
In summary, the filter/LPG stage is mostly about dynamics and final tone smoothing. Unlike a typical synth, you won't be sweeping a cutoff knob constantly as your primary tone control – instead, you'll be morphing the oscillators (Size/Tilt/Fold) and using performance pressure to influence brightness. The filter's resonance can be thought of as a flavor knob to add more "acoustic" ring or wild self-oscillation if needed. If you do turn the cutoff knob down, it will uniformly mellow everything, which can be useful if the patch is too bright. The envelope and LPG give each note an expressive volume contour that you shape via how you play and via the articulation controls.
As a starting tip, try to keep the cutoff frequency always at a higher level and use the pressure of your fingers instead (which effectively dynamically changes the filter's cutoff).6-9 Pan
Following the filter stage is the Pan control. This knob is straightforward—it sets the stereo position of the sound, which, up to this point, remains monophonic in the signal chain.
This stage also serves as the insertion point for the external audio input (via the jack/XLR connector). The external signal is routed pre-pan, meaning it will be processed together with the internal sound and placed in the stereo field accordingly.
This is a parameter worth modulating with the LFO—sweeping or bouncing the pan creates dynamic spatial movement, adding width and motion to internal and external sounds.
6-10 LFO

The Uranograph’s LFO (Low Frequency Oscillator) adds movement, rhythm, and expressive modulation to your sound. With hands-on control via panel knobs and flexible routing via the menu system, the LFO is designed to be fast, musical, and deeply integrated into performance.
The LFO is controlled directly on the panel with three dedicated knobs:
Waveform – Select from multiple modulation shapes
Speed – Set how fast the LFO oscillates, as a divider or multiplier of the clock
Amount – Adjust how strongly the LFO affects its destination
These allow you to sculpt modulation in real time.
Assigning the LFO
To route the LFO to a parameter:
Press the Modulation Button (marked with the two-circle icon).
Scroll with the encoder to LFO Destination.
Press to select and turn the encoder to choose a parameter.
Press again to confirm.
This destination is saved per preset, giving each patch its own modulation behavior.
Waveforms
You can select through the rotary knob on the panel from the following LFO shapes: Sine, Triangle, Ramp, Saw, Square, Random
Note:
While Sine and Triangle waveforms are free-running (continuous), all other waveforms (Ramp, Saw, Square, and Random) are retriggered with every key press.
This makes them ideal for synchronized or per-note modulation.
Available LFO Destinations
You can assign the LFO to modulate any of the following parameters:
mod-amount, sub-amount, wave size, wave tilt, wave fold, alias, filter freq, delay time, diffuse, pan, volume, pitch
Tips
Sine or Triangle on Filter Frequency – Ideal for evolving pads or subtle tonal motion.
Sine on Volume – Creates a classic tremolo effect.
Low Amount of Sine on Pitch – Produces natural vibrato, perfect for expressive or analog-style sounds.
Random or Square on Pan – Generates rhythmic or unpredictable stereo movement; great for percussive or glitchy textures.
Ramp on Wave Tilt – Introduces dynamic timbral shifts that reset with each note, especially effective for plucked or sequenced lines.
Minimal amount of LFO on Pitch – Emulates vintage pitch instability, giving a more organic, analog feel.
Ramp on Diffuse – Acts like a reverb ducking effect, pulling ambience away at note onset and swelling back in.
External
Audio
Input

The Uranograph includes a balanced combo XLR/6.3mm input with a built-in studio-grade preamp, allowing you to route external sound sources directly through the effects and looper engine.Whether you're using a microphone, guitar, or another synth, the external input lets you integrate and process it seamlessly with Uranograph's sound engine.
Combo Audio Input [1]
Accepts XLR or 6.3mm TRS/TS cables — suitable for microphones, instruments, or line-level devices.Preamp Gain [2]
A dedicated knob lets you set the input level from 0 to 40 dB (100x), ensuring clean signal with low noise and distortion.Phantom Power [3]
A switchable +48V phantom power is available for condenser microphones. A nearby indicator shows whether it’s active.External Volume Fader [4]
Controls the blend of the external input in the overall mix. This should be kept low when no input source is connected to avoid unwanted noise.External input to FX [5]
Set if External input goes to the FX section or directly to the Loop section (red LED: FX active)
The external signal is blended with the internal synth just before the pan and FX stage, meaning:
It passes through delay and reverb just like the internal synth voice
It can be captured and layered with the dual looper system
This opens creative opportunities, such as playing guitar through Uranograph’s ambient effects and looping it alongside synth lines or processing vocals with rich reverb while performing live.
How to Use the External Input
Connect your source to the XLR/6.3mm input [1]
If using a condenser mic, activate phantom power [3]
Raise the External Volume fader [4] to maximum temporarily
Gradually turn up the Preamp Gain knob [2] until the level is comfortable
Adjust the External Volume [4] back down to sit well in the mix
FX
8-1 Overview

To further sculpt the sound and add spatial dimension, the Uranograph includes an integrated stereo delay and parallel reverb in its signal path (after the synthesis engine, before the looper). These effects are specifically tuned to complement the instrument's character and are tightly integrated rather than feeling like afterthought add-ons.8-2 Stereo Morphing Delay
The delay section is quite sophisticated. A single Delay Time knob (labeled ΔT or Delta T) controls the delay time, but with a twist: in the first quarter of its range (0–25%), the delay operates in a special Karplus-Strong resonator mode.
In this zone, as you adjust the knob, the delay time changes in tiny increments (microseconds) rather than rhythmic values, effectively turning the delay into a tunable resonator or comb filter. When excited, this produces plucked string or resonant body sounds – you can use it to create metallic resonances or drone notes by feeding the delay with impulses (like the plucky attacks or noise). It's like having a physical modeling element: at very short times and with high feedback, the delay will ring at a pitch, adding a harmonic resonance to your notes.
As you turn the ΔT knob past 25%, it seamlessly shifts to a tempo-synchronized delay. Beyond that threshold, the delay time snaps to subdivisions of the current tempo (either the internal clock or an external MIDI/analog clock). The quantized rhythmic values include 1/32, 1/16 triplet, 1/16, 1/8 triplet, 1/8, 1/4 triplet, 1/4, and 1/2 note delays. This covers a wide range, from quick slaps to long echoes in musically relevant divisions. So, after the initial resonator region, you'll feel the knob "step" through these standard delay times – which makes it easy to dial in a synced echo without guessing.
An LED indicates the current division blinking at the delay repetition time.
The Feedback (Regen) knob controls how much of the delayed signal feeds back into itself. Low regen gives a single echo, higher values give multiple repeats, and at extreme settings, the Uranograph allows infinite repeats without overload (meaning it will hold a loop of delay indefinitely until you lower it, but it manages the gain to prevent clipping or runaway).
This is great for creating drones or sustaining an ambient backdrop from what you played.
Additionally, a Delay Shift or Stereo Offset control lets you introduce a slight time offset between the left and right delay channels.
Turning Delay Shift allows one channel's delay time to be adjusted as a percentage offset from the other. This creates stereo ping-pong or polyrhythmic echoes and can significantly widen the stereo field.
For example, you might set the base delay to 1/8 notes and then offset one side by 10% – you'll get a swung, interesting echo pattern bouncing across the stereo. When used subtly, this widens the reverb; it can cause complex rhythmic delays when used extremely.
All these delay parameters are on the panel for immediate tweaking: ΔT (time), Regen (feedback), and Stereo Shift. Depending on settings, the delay can go from a tight resonator to a clean digital echo to a slap-back or long dub delay. It's an essential part of Uranograph's sound design toolkit, meant to be played as part of the instrument. (If you turn the delay to very short and high feedback, it essentially becomes part of the synth engine's timbre, adding a resonant ring to every note; if you set longer synced delays with moderate feedback, you can easily layer notes into rhythms and ambience.)
8-3 Diffuse
The reverb in Uranograph is designed as a one-knob ambient effect that ranges from subtle to vast.
The single control simultaneously adjusts multiple internal parameters of the reverb algorithm to transform the space smoothly.
In the lower half of the knob's range, the reverb acts like a small or medium room – adding short reflections that give clarity and presence to the sound without washing it out. This is great for adding a bit of acoustic realism or tail to plucked and percussive sounds. As you turn the knob up, the reverb size and diffusion increase: by midpoint, you're probably at a hall-sized reverb, and at the maximum, the Uranograph generates dense "cloud-like" ambience – enormous, ethereal reverb that can turn your notes into a lush pad or texture.
Essentially, at high settings, it becomes a modulated and very high-density reverb that smears the sound into a dreamy wash (great for soundscapes where the line between sound and reverb blurs).
The Diffusion and other internal parameters adapt automatically as you turn the knob. Because it's parallel, the reverb doesn't drown out the dry signal unless set very high – you can always still articulate notes on top of a big ambient tail. For users, this means you don't have to tweak multiple parameters; just dial in how much atmosphere you want. At minimum, the reverb is effectively off or extremely short, and at maximum, it's like a huge fog of sound. The reverb is parallel to the delay (they are separate but combined at the output), so you can use both simultaneously. They are tuned to work well together – e.g., you can have a rhythmic delay and a giant reverb without things getting too muddy, or a resonator-like short delay still getting ambience around it.
Looper
9-1 Concept
One of the Uranograph's most powerful and creative performance tools is its dual "tape reel" looper system. Inspired by Frippertronics and classic reel-to-reel workflows, this looper allows you to capture, layer, and reshape audio in real time — with two independent, continuously running virtual tape reels.
Loop A Arm button
Loop B Arm button
Loop A volume
Loop B volume
Loop Time
Rec keyplate
Clear keyplate
9-2 Recording & Layering Loops
The looper captures the post‑effects mix and routes it to one reel at a time—never in parallel:
Two Arm buttons [1 & 2] let you choose which reel is actively recording (only one can be armed at any given moment, while the other plays back its existing loop).
Recording levels are settled by the main synth volume and the external input volume faders.
Each reel has its own Playback Level [ 3 & 4] for precise mixing control.
Holding P3 and then pressing P4 will start and stop recording or overdubbing on the selected reel.
Holding P4 and then pressing P3 Instantly clears the selected reel.
The looper works post-effects, meaning it records the sound after it has passed through delay, reverb, and external input mix. What you capture is the fully processed signal — not just the raw oscillator — allowing you to loop entire gestures and atmospheres with spatial effects baked in.
The Uranograph runs two virtual tape reels simultaneously: Loop A and Loop B.
These reels are always active in the background, but whether they're recording, overdubbing, or playing back depends on your control.
Each loop has an independent length, set in musical time relative to the global tempo. You can choose from 1, 2, 4, 8, 12, or 16 beats (1 beat = quarter note), using a dedicated loop length knob[5]. Once set, the reels continuously cycle at the selected length — capturing, layering, and evolving audio in sync with your performance.
9-3 Reel options menu

Press and hold the reel arm button to access the Reel Option Menu. In this menu, you can configure options by pressing the P1, P2, P3, and P4 keyplates on the control keyboard.
P1 - Recording Mode
One‑shot – When you press Rec, the deck first waits until it detects audio, then records for the specified loop length before switching to playback.
Continuous – Inspired by Frippertronics, this mode records and overdubs non‑stop, letting the music evolve organically with every pass.
P2 - Reverse Playback
Flip any reel into reverse mode to play the loop backward. This classic effect inverts the audio in time, adding surreal movement or dreamy reversals to your layers.
P3/P4 - Decay Control – The Erase Head
The Decay Control governs how much of the existing audio is retained each time the tape cycles.
This allows for dynamic loop memory: old sounds slowly disappear as new ones arrive, creating constantly changing textures.
Decay 0% – Nothing is erased; layers accumulate indefinitely for true sound-on-sound.
Decay 100 % – Each pass completely overwrites the previous one, acting as a transient looping buffer.
Anything in between – Produces gradually fading echoes that balance freshness with continuity.
Subsequent presses of P3 or P4 increase or decrease the tape erase head by 10% at a time.
9-4 Re-Pitch Mode – Play Your Loops Like Samples
A nice feature of the Uranograph's looper is the Re-Pitch mode, which allows you to treat your recorded loop like a sampler.
Currently, this feature is more of a "bonus" than a fully developed function, as it gradually introduces audible artifacts into the sound.
We plan to improve it in the next firmware upgrade, but since it would require a significant amount of CPU resources, don’t expect too much from this.
Select a reel with the arm button, press the arm button again to enter Re-Pitch mode.
The note keyboard will turn green, indicating that you're no longer controlling the synth engine.
In this mode, each key triggers a pitch-shifted version of the selected loop — transposed in semitones based on the key you press. You can also use the octave plates as well.
This effectively transforms the looper into a tape-sampler-style playback engine.
Pressing a key will reset the loop from the start.
You can resample and rearrange your loops in real time, transforming captured audio into melodic phrases or rhythmic variations with ease.
Keep in mind: once you're in Re-Pitch Mode, any decay settings previously applied to the loop will be temporarily bypassed—the loop will no longer fade or degrade over time.
Mixer /
Output
10-1 Mixer Section
The Uranograph offers four physical faders for real-time volume control:
Main Synth Volume
External Input Volume
Loop A Volume
Loop B Volume
These let you blend your performance layers and effects with precision — adjusting levels on the fly during live sets or improvisations.
10-2 Main Output & Headphones
The Uranograph features two distinct output paths for flexible routing:
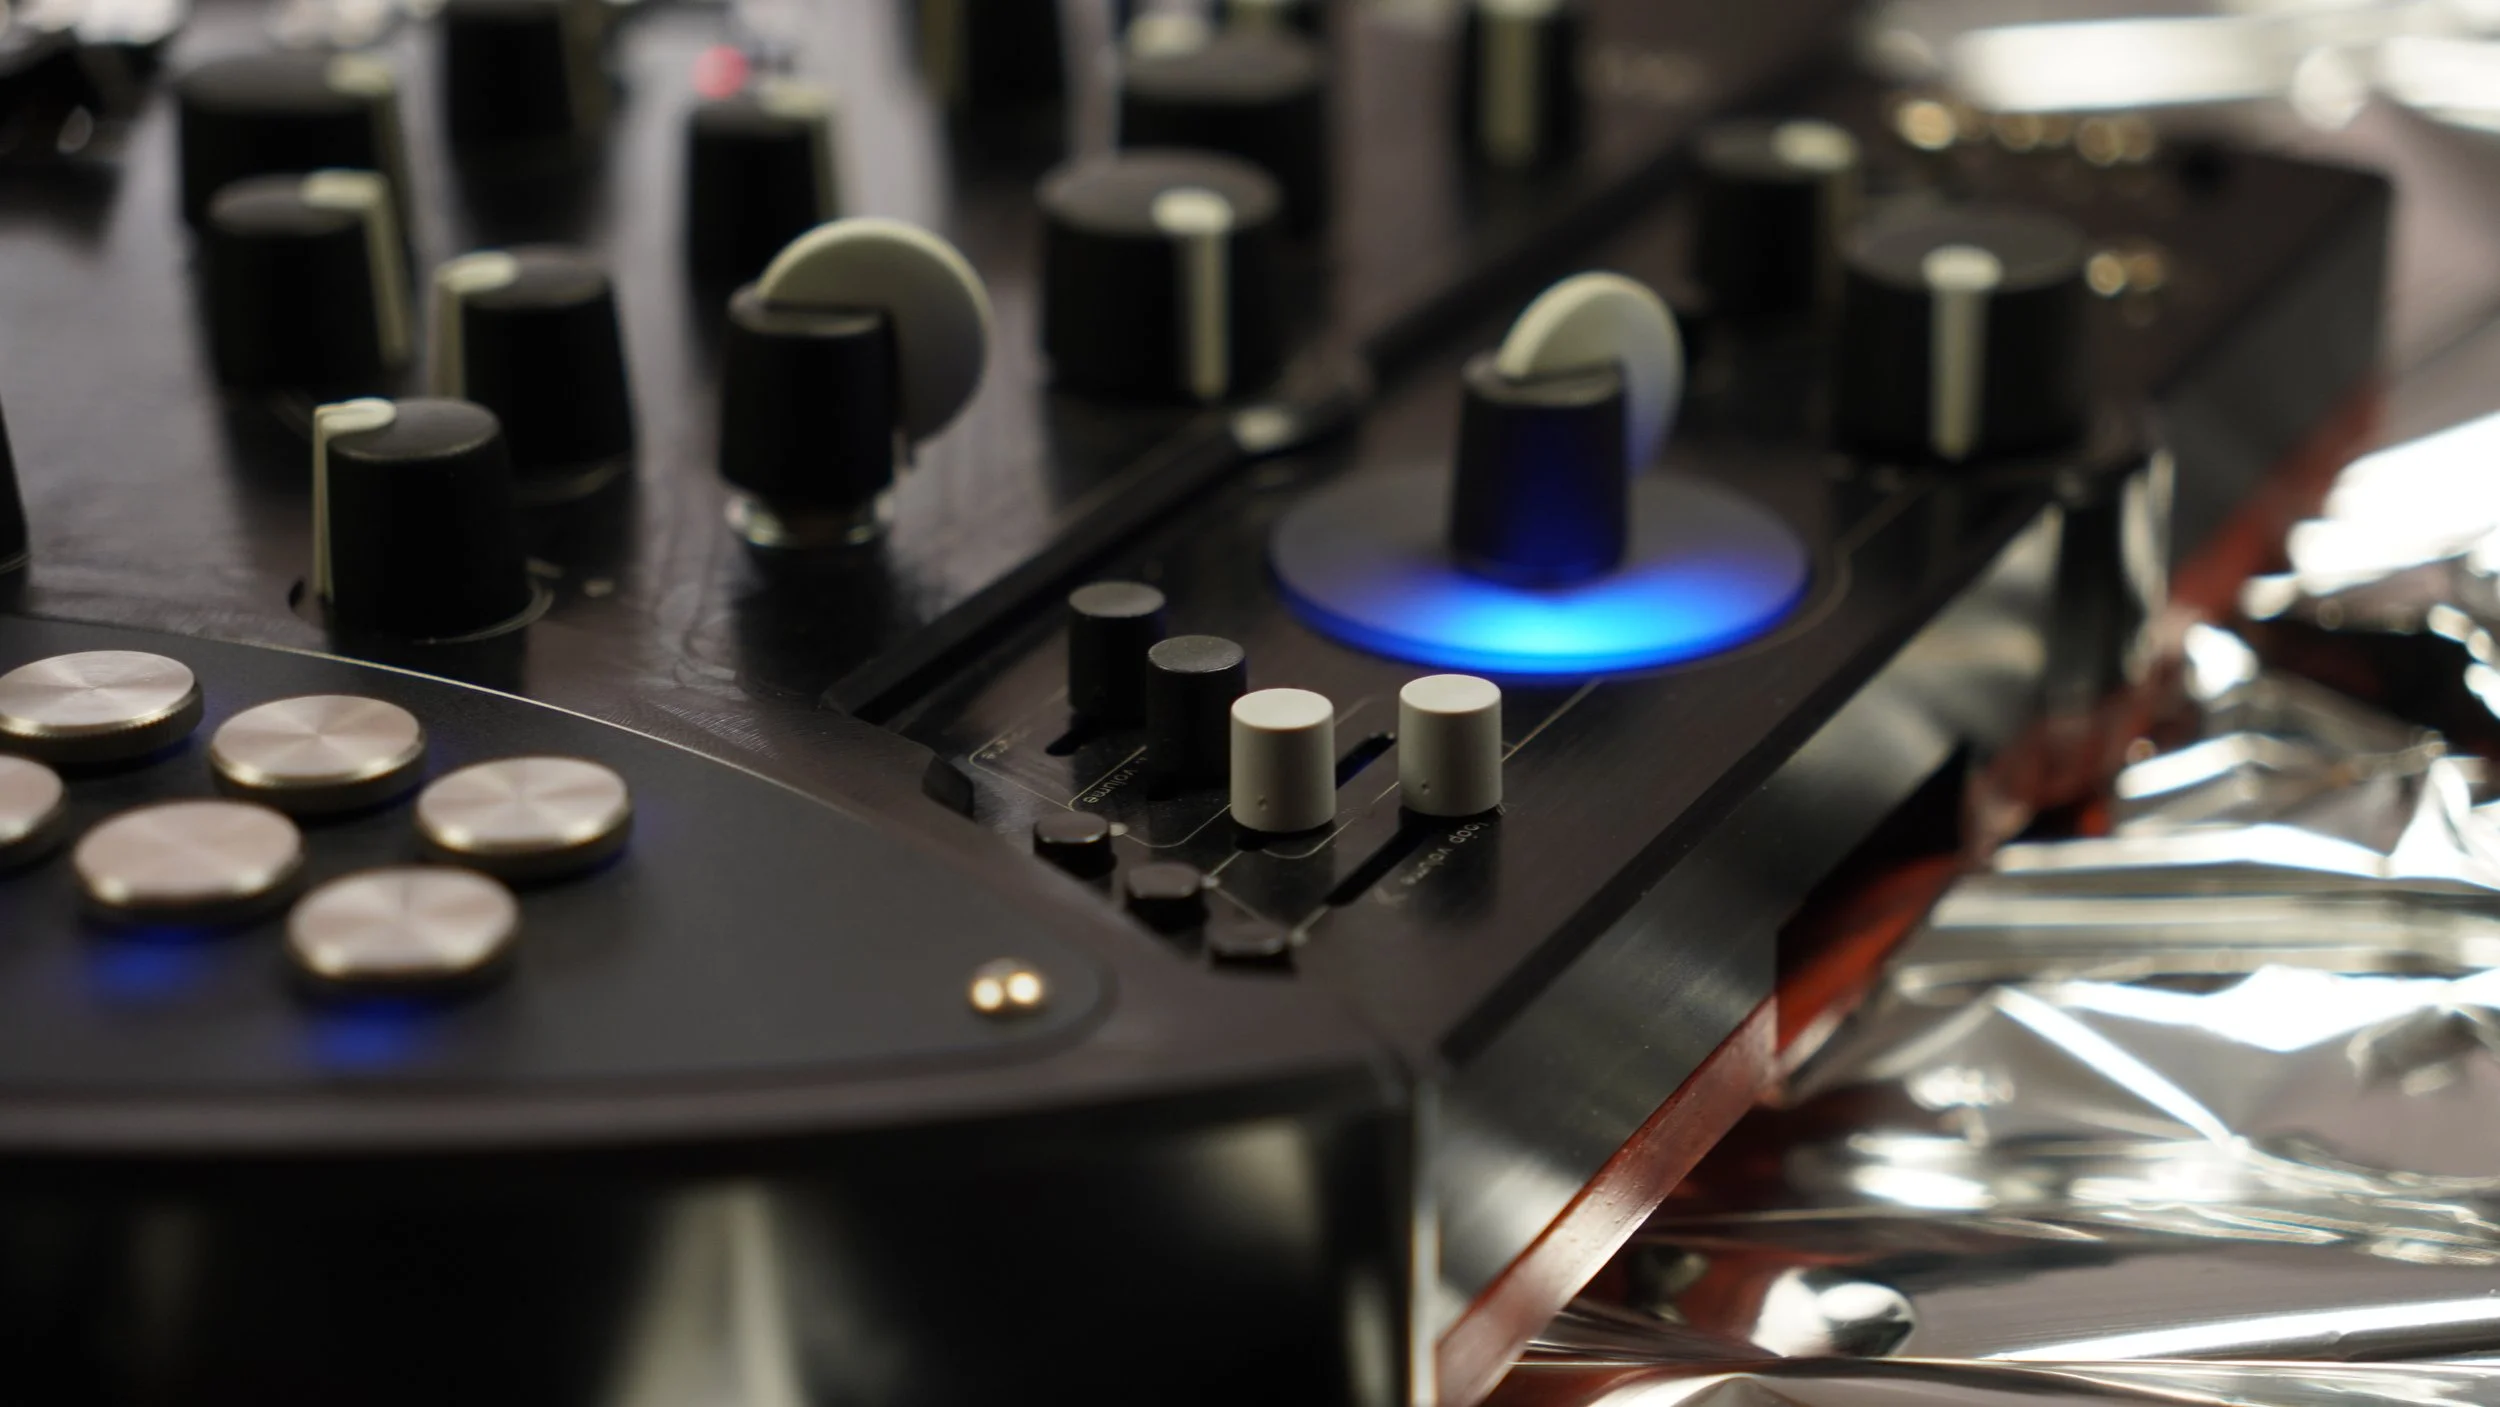
Monitor output volume
The Monitor Output Volume knob (the big one in the photo) controls the level sent to the rear-panel 6.3mm balanced jack. This is your primary connection to an audio interface, mixer, or amplifier.
It controls only the final output stage — not the internal audio level of the synthesizer itself.

Headphones
Uranograph also includes a dedicated 3.5mm stereo headphones output, located on the front or side panel.
This output has its own independent volume control, allowing you to monitor privately without affecting the main output level.
A high-quality headphones amplifier IC is used to ensure clean, powerful, and detailed sound, even with demanding headphones — making it ideal for live monitoring, sound design, or quiet practice.
Both outputs can be used simultaneously — for example, sending the main out to FOH while monitoring with headphones on stage.
A built-in metronome click is available in the headphones output only. This is a very handy feature: it provides a tick at the tempo that only you can hear in your headphones, not in the main outputs. This helps you stay in time with the loop length or an external clock without that click being sent to the audience or recorder. The metronome has an individual volume knob.
Clock
handling
11-1 I/O

At the top-right corner of the Uranograph panel, you'll find three 3.5mm jack connectors designed for synchronizing with external hardware:
Sync In
Clock Out
CV In (not yet implemented)
These connections expand Uranograph’s flexibility in hybrid and modular setups, allowing it to stay in time with external gear or act as a sync master for other devices.
Sync In – Dual-Mode Clock Input
The Sync In jack is a multi-purpose input designed to accept both analog clock signals and MIDI clock via TRS.
Analog Clock Mode:
Connect a modular synth or any other device that outputs a traditional analog clock signal. Uranograph will interpret this as a 1 pulse per quarter note (1PPQN) clock.MIDI Clock Mode:
Use a MIDI TRS-A adapter (standard Type A) to send a MIDI clock signal to the Sync In jack. Uranograph will interpret it as a 24 PPQN MIDI clock, just like most drum machines, grooveboxes, or USB–DIN MIDI converters.
Upon detecting an incoming clock, Uranograph automatically switches from internal to external sync. An LED near the top panel will indicate:
Red – Analog Clock
Orange – MIDI Clock
When externally synced, all tempo-based functions (Trillo, Glissando, Delay, Looper, etc.) will follow the external clock. You can no longer set the internal BPM manually or via tap tempo.
To return to internal sync, simply unplug the cable from the Sync In jack.
Clock Out – Analog Clock Output
The Clock Out jack outputs a standard analog pulse, perfect for syncing external modular gear or sequencers to Uranograph's internal clock.
This allows you to use Uranograph as a master clock source, keeping your external rig in sync with your performance.
11-2 Clock Menu

If you're using Uranograph's internal clock, you have two ways to set the tempo:
1. Tap Tempo
Tap the Clock Plate (marked with a clock icon).
Each tap will update the tempo based on your rhythm. After a few taps, a brief pop-up will appear showing the new BPM set by your tapping.
This method is ideal for quickly syncing tempo by ear or during live performance.
2. Set the bpm
To set the tempo more precisely, press and hold the Clock Plate to enter the Clock Menu.
Turn the encoder to adjust the BPM value directly. This allows fine control over the tempo.
Preset
Storage
12-1 Preset Storage & System Settings
Despite its deep architecture, the Uranograph offers a fast and intuitive preset system, making it easy to manage, recall, and store your sounds for performance or studio use.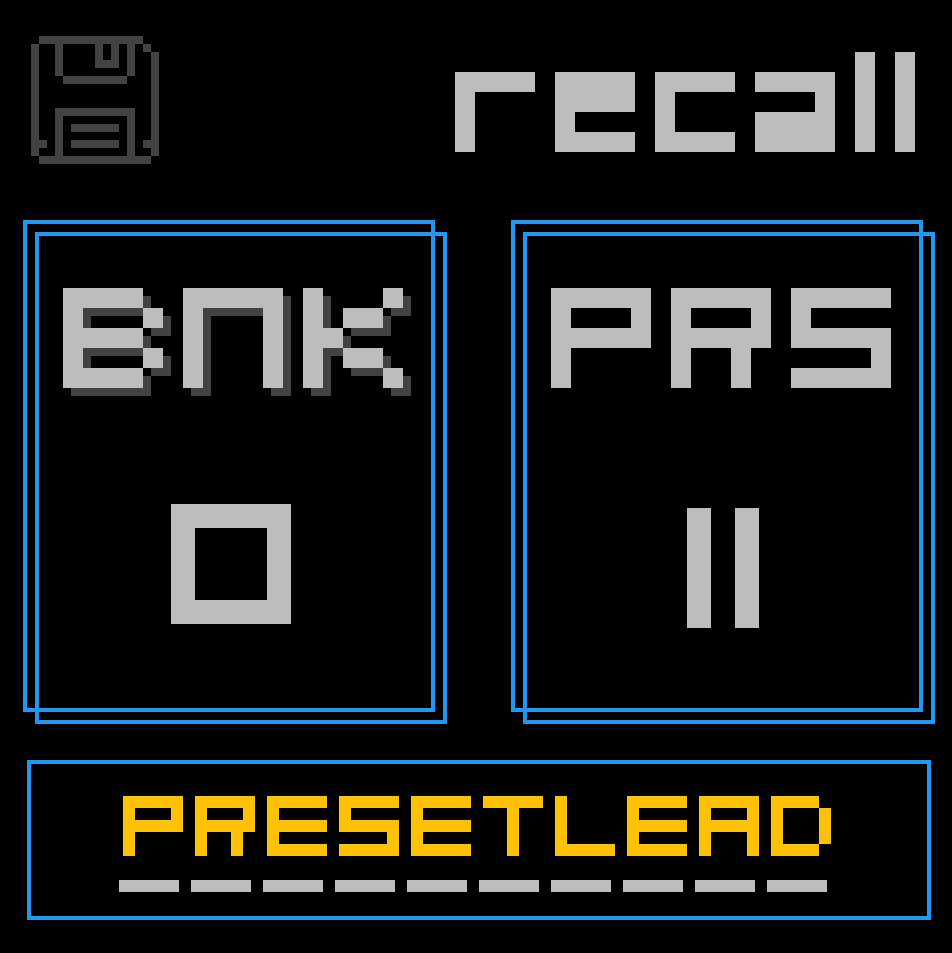
● Preset Capacity and Structure
You can store up to 96 presets in the Uranograph's internal memory. Each preset acts as a snapshot of pretty all the instrument's state, including:
Synth engine parameters
Modulation and assignment settings
Keyboard tuning and layout
FX settings
The Looper, Mixer section (volume levels, loops), and tuning trimmer are the only ones not to be stored as part of the preset.
The presets are organized into 8 banks of 12 presets each (Bank 1 = Presets 0–11, Bank 2 = 12–23, etc.). This structure mirrors the 12 touch keys on the keyboard—making it easy to recall presets by simply tapping a key when in Preset Recall Mode.
12-2 Preset Menu

To enter the Preset Menu, press and hold the touchplate with the three-page icon.
By default, you're in Recall Mode.
Saved presets are indicated with a white LED under the corresponding key.
Simply press one of the 12 note keys to select a preset from the current bank.
Release the menu touchplate to load the selected preset instantly.
To switch banks, use the Octave Up/Down plates while in the Preset Menu—each octave corresponds to a different bank.
This design makes it easy to switch sounds during a live set with minimal interruption.
Saving & Deleting Presets
To save or delete a preset:
Enter the Preset Menu by holding the menu touchplate.
Press:
P1 (on the control keyboard) to enter Save Mode
P2 to enter Delete Mode
Press now one of the 12 keys on the Note Keyboard to save or delete the related Preset.
Renaming Presets
To rename a preset:
While in the Preset Menu, press the encoder to enter name edit mode.
Turn the encoder to scroll through letters and characters.
Press the encoder to move to the next character.
There is no need to confirm it; Uranograph automatically saves the name during the edit.
This allows you to label your preset clearly for quick reference in performance or composition.
Switch to panel
If you quickly tap the Preset Menu touchplate (instead of holding it), you’ll toggle between the active preset and the physical panel state.
This is useful because it gives you two layers of sound control: one defined by the preset, and one by the current knob positions on the panel. After loading a preset, the knob positions may not match the actual sound, which can feel disorienting. This quick toggle lets you return instantly to the panel state, making it easy to regain control or start fresh.
Firmware
Update
fw1.12 beta
Published on 21/11/25, not extensively tested
Another update already? Yes, I had some time between batches, and I continued updating the firmware.
This time, it may be a while before the next update, but I hope this one addresses several errors and improves the overall sound and instrument quality.
I've made many changes, but primarily, the issue with the potentiometer scratching sound seems to be resolved, and the controls are now smoother.
Delay time and shift no longer make that awful sound when turned.
Pan is now smoother with a better algorithm.
The main oscillator engine has been improved, allowing for much greater control over the timbre.
I've also fixed the sensitivity issue when pressing multiple keys and addressed several minor bugs in the menus.
Loop decay has been inverted as intended in the manual.
Now, at 0%, your loop will play indefinitely, while at 100%, it will be erased immediately.
Additionally, the decay settings will not affect the loop when you are not recording.
It appears that the p1/p2 amount feature was not working, and the modSpeed destination was also ineffective.
This time, you’ll need to update both the AUDIO and CONTROL CPUs.
Update first the CONTROL CPUs, the one with the USB-C.
In the AUDIO CPU, there was a small bug that caused inconsistencies in boot mode access.
So, after updating the control CPU, restart the Urangroaph, go into the system MENU, hold the encoder over "update CPU" until it says “ready to program”, and then connect the micro USB.
It’s possible that the PC may not recognize it right away. Don’t panic; try this multiple times. Disconnect the micro USB cable, power off the Urangropah, turn it back on, and restart.
There is no need to re-program the control CPU if this happens.
I apologize for the inconvenience. With this new firmware, that issue is also fixed, and future updates will be more consistent.
fw1.11 beta
Published on 19/11/25, not extensively tested
FW1.11 is the first firmware update of the Urangroaph
It’s a minor update that fixed some bugs reported on the first units.
There is no need to update the Audio CPU; you can follow only the control CPU update above.
Solved bugs:
p2 amount was not reachable into the the assign menuon c# key at startup alias frequencies are not at 0BANK saving slots are now 8 as they shouldTo avoid to inadvertently delete the memory, now you have to keep the encoder pressed for two seconds over "erase memory" to confirm.fixed a menu visualization error into System Menu (selecting notes Layout make format memory text orange)fixed a menu visualization error into Assign Menu (pressing again assign button when in already in assign menu cause screen overlap)Metronome and clock Out stop working after a while
Firmware Procedure
What you’ll need:
A Windows PC or Mac with an internet connection
One USB‑C cable and one Micro‑USB cable
Both cables must support data transfer, not just charging.
Most update issues are caused by using power‑only cables.
There is not so much space around the Uranograph USB ports; please find slim cables.
Update the control CPU
Download and install the CP210x USB‑to‑UART driver, then restart your computer: https://www.silabs.com/software-and-tools/usb-to-uart-bridge-vcp-drivers?tab=downloads
With the Uranograph powered on, plug the USB‑C cable into the Uranograph's USB-C ports.
Under “Program,” leave the baud rate unchanged and click Connect.
In the pop‑up window, select CP210x USB‑to‑UART (or a similarly named entry) from the list of COM ports.
When connected, you’ll see a form with Flash address fields
Click "Browse", select 1.bin
Copy and paste 0x00010000 into the flash address field (VERY IMPORTANT!)
Click Program. When the status reads “Hard resetting via RTS pin…”, click Disconnect and restart the Uranograph.
** If something goes wrong and your Uranograph does not light up anymore, do the procedure again until point 6, then upload those four files (instead of only one) at the same time, by pressing the "add file" tab button
recovery/bootloader.bin to address 0x00000000
recovery/partitions.bin to address 0x00008000
recovery/boot_app0.bin to address 0x0000E000
1.bin to address 0x00010000
Your control CPU is now updated!
Update the audio CPU
Disconnect the USB-C and restart the Uranograph. Connect the micro-USB cable to the Uranograph port.
Monitor the audio through headphones or main outputs.
On the Uranograph, press the button with the PC icon to open the System menu.
Select Update CPU, press and keep the encoder pressed; wait for the display to show “Ready to program.” Now, you can release the encoder.
You should hear a “POP” in the audio, meaning the audio CPU successfully enters program mode. If not, turn off the Uranograph, disconnect the micro-USB, insert it again, power on the Uranograph, and restart from the beginning of the audio CPU update.
On your computer, open https://flash.daisy.audio/ and choose File upload.
Select 2.bin.
click Flash
In the pop‑up window, select FS in DFU mode and wait for the end of the update
If you can’t see any device in the pop-up windows, please try another cable and ensure that it is a data cable.
If you keep having problems, a USB driver reset could solve the issues: https://daisy.audio/tutorials/zadig
That’s it—your Uranograph is fully updated!
System Architecture Overview
The Uranograph is built around a dual-CPU architecture. An ESP32-S3 microcontroller (from now: "control CPU") is the interface brain, handling user input, display/UI, preset management, and MIDI/tempo duties. A separate 32-bit ARM Cortex-M7 microcontroller (from now: "audio CPU") with a 24-bit audio codec runs the audio engine and DSP algorithms. This separation of duties ensures that complex sound synthesis and effects run with high audio fidelity and low latency, while the user interface remains responsive.